Showing posts with label homesteading. Show all posts

Sunday, January 3, 2016

Maintenance and storage of pressure canners

I wish I had a picture of the safety overpressure plug that I threw away several years ago, from one of my pressure canners.  I was naïve and didn't realize these things needed replacing from time to time.  I'd use my pressure canners and when I was done for the season, I'd wash them well and store them in a shed where I kept cases of empty jars and extra rings and such.

This particular safety plug was literally crumbling.  The rubber was aged and eaten away from it's edges.  I'd started a load of jars through the canner and air kept escaping around the plug.  I tried (foolishly) to pack a towel over it and weight it down, but it just soaked the towel with steam.  I shut the canner off and let it cool down, then finished my canning with my other canner.

Next time we were in town I stopped at the Hardware store and showed them my plug.  They sold me a box with half a dozen plugs in it for a few dollars. 

The years passed and then one of my canners started leaking around the seal.  I tried holding the handles down tight, to stop the escape of steam.  It worked sometimes.  While I held it down tight the pressure would build and then the canner sealed and I was able to continue that load of jars.

I tried oiling the seals to buy time.  These are the old seals made of rubber.  Oiling did work...for a while.  Then the seals were so stretched it was hard to keep them in the lid as I put it on the canner.  sometimes it took a few tries to get the lid on with the seal in place.  That was stupid.  I should have gone straight to the hardware store and bought new seals. 

Even though it seems like the canner is up to pressure and the weight eventually jiggles and everything seems to be going right, it's possible those old seals or plugs are not really letting the canner reach it's proper pressure, and without that, the contents of the jars may not reach a high enough temperature to safely preserve the food.

Nowdays I take that seriously.  As preppers we should always have spare parts stored away for when we need them, but for anyone who uses pressure canners (or anything else important to their survival), it's nice to have the parts on hand when you need them!  Then you don't have to stop in the middle of canning a batch of something to run to the store to buy what you need.

My canners are made my Mirro and have the model number stamped on the bottom.  It's good that they do, because it's not in the book that came with my canners.  I hunted all through the book and finally found a page with replacement part numbers.

Replacement parts list for my canner
 

It was buried at the end of the section in English, right before it went into other languages.  My canners are from the 1980s, before there was internet, and it assumed you would order parts direction from them.  Now days I'm more likely to hop onto amazon and just order the parts.  Here's a link, in case you want to check and see if they have the parts for your brand and model of canner. 

Amazon, Pressure canner seals, safety plugs, and other parts

They're considerably cheaper than the hardware store, and more likely to have the part you need in stock. 

Winter is a great time to look over your seals and safety plugs, and see if you need to order any replacements.  It's a good idea to order extras to stock up and have on hand. 

When my extras arrive I check to see that I have the right ones, then I put them back in their box and vacuum seal them in food saver bags to slow down oxidation.  Then, just like the food that I preserve, I store them in cool, dark places.  Heat and light can break down the material just like it does to food.

Some newer seals are made of silicone or plastic and don't need as much care to maintain them.  The old rubber seals like my canners use can dry out and crack over time.  The old wives tale of soaking them in water isn't really effective.  Rubber doesn't absorb water.  If you feel the need to "soften" or preserve them, spread a thin layer of cooking oil (any type) on them.  Wipe excess oil off with a paper towel before use.  The mirro company warned (in my instruction book from the 1980's) not to over-do the oiling of the rubber seals, but didn't explain why.

My standard practice for storing my canners over the winter was to put a light layer of oil on the seal and the safety plug.

The seal is laying on the canner lid.  The safety plug (and it's hole to the left) are
in the black circle.  Behind the canner is the jar of coconut oil I used on them.

I have a vacuum sealer now, but I don't use it for this because I never know when I'll randomly acquire something to can, or decide to do up a batch of beans (from dry) or something.  So I still just put them in a ziplock bag.

Then I toss it inside the canner and put the lid on.  My mother always said not to store the canner with the seal in place and the lid on tight.  Again, she never said why.  My speculation would be that it might compress the seal, sitting in storage, and reduce it's lifespan. 

Seal and safety plug, lightly oiled, stored in canner
in ziplock bag.


I store the pressure weights elsewhere, in a safe location in my kitchen.  They're too expensive to replace.  Around ten years ago I misplaced mine and it was going to cost $30 just for that little round weight that sits on the spindle on top of the canner.  Now they've come down to around $20.  (Canner weight for my Mirro Canner)

It's no badge of honor to be able to brag that you got ten years out of a gasket seal for your canner, or that you've never had to replace the safety plug.  Canning is more than a hobby, or a necessary activity for food preservation or survival.  It's a serious issue of safety and proper management.  Be sure to include extra parts in your storage, and store them for the longest shelf life possible.


Please leave comments below or email them to:


Thank you!

Susan


Tuesday, July 14, 2015

Electronic books vs. print books, for information storage.


As preppers we have a lot of information we want to save and have handy at our fingertips when we need it.  In the last few years we've moved more and more to electronic forms of storing that information.  We buy kindle books, or save pages to our computers, hoping that we will be able to access it no matter what.
 
In our case, we have a solar electric power system for our house, and we were smug that we would be able to access books and information stored on our computers and other devices long after any possible "SHTF" situation.  Even if the batteries would no longer hold a charge, we could power the devices directly off our solar panels. 
 
Oh, sure, sometimes we'd fork out the money for an actual print book, but right now on my kindle I have over 500 books stored.  So does my husband.  Not all of them are things that will be essential to survival if the world collapses.  The books containing 30 excellent muffin recipes and 15 hacks for a better work-out can probably dissolve into cyber never-land and I could continue on.  But the books about edible wild foods and how to set a snare for small game are a little more likely to be useful.
 
We know that electronics have to be replaced from time to time.  They get viruses or become outdated, or they have other problems.  Yet it didn't really occur to me how much information could be lost if this happened at a time when we can't easily retrieve the information on them.  When I bought a tablet I was able to add my kindle account to it.  I left all the previous books on my old black and white kindle and just started downloading any new purchases to my tablet.  
 
When the handwriting was on the wall that my computer was giving out two year ago, I emailed all my document files to myself so I could download them to my new computer, and then backed up all my files and pictures. 
 
However, we have had two things happen recently that have undermined my confidence in being able to access our books and information.  The first one was that my tablet would not turn on.  My grandson had been playing games on it and I figured he had just drained the battery totally into darkness, so I charged it.  And charged it and charged it.  It still would not turn on.  I was about to grudgingly take it in to see if it was fixable and I had resigned myself to losing the pictures on it. 
 
Then someone suggested I try a different charger cord.  My tablet has a weird connection for the charger cord and nothing else we owned used that same one.  So I bought a new cord and that took care of the problem.  Big relief, right?  No.  I realized that even if my tablet continued to work after a "SHTF" event, if I didn't have a working charger cord the tablet would be useless. 
 
The suggestion here might be that we buy and put away a few charger cords for our electronic devices that we expect to need if something were to happen and we could not buy a new cord.  That's something you'll have to each decide for yourself.
 
The other thing that happened is that my husband's old black & white kindle won't turn on.  He plugged it in and charged it, and the light obediently turned to green when it felt like the battery was charged.  The advertising picture that sits on the screen when the kindle is turned off is there on the screen like it should be.  But the kindle doesn't come on when he pushes the button.  We've tried over and over.  Short pushes, long pushes, nothing makes it come to life.  We still have not solved that one, but at least he can retrieve all the books and move them to another device such as his tablet.
 
If the "SHTF" he could not have that information transferred since it takes the internet to do so, by going through amazon's "manage my kindle" feature.  All those books would be lost.
 
We can have a store room full of spare computers, tablets, kindles, etc., and still risk losing all our information.  The answer would be to have "hard copies", such as print books, or by printing information off the computer.  Some information is harder to save and print than other information.  I've recently had a few people ask how they could print up some of my blog posts.  Unfortunately I am not very "techy" and I don't know how it can be done.  If something doesn't have a "printer ready" place to click on the page, I just assume it's beyond the scope of my technical knowledge.
 
I've recently learned how to do a "screen shot" (okay, young people, stop laughing!  I know it was easy for you!  lol) and save it to my computer like a photo image.  From there I could theoretically print it like a picture, after enlarging it enough to read it.  That might be one option for technically-challenged people like myself.
 
The copyright laws that cover information published on the internet have a lot of gray areas.  But generally if you're printing something for your own use, it's "okay".  If you present it to others as your own writing, that's bad.  If you re-publish it in your own name, that's plagarizing and it's bad.  If you sell the information to others, even with the original author's name on it, that's bad.  If you quote parts of it in your own writing AND GIVE CREDIT TO THE ORIGINAL AUTHOR, that's okay. 
 
The exception is "free downloads" from pirate or bootleg websites that illegally offer kindle and other electronic books.  Please make sure you are getting your books from a legitimate site and not a 'stolen' book offered on these book download sites.  If you get any of the kindle books that I have published from anyone except amazon.com, you are getting an illegal download. 
 
You should probably do your own searching regarding legal issues, but I'm giving you permission here on this post to print up anything you can off of my blog IF IT IS FOR YOUR OWN INFORMATION and you are not going to try and sell it to others.  You can even make another copy for a friend or relative, since this information is here on a blog that I have given the public access to, and your friend or relative could print it up themselves for free, too, if they wanted.  But instead you have graciously used your printer ink to provide them with a copy of information that I hope is helpful for people both before and after a SHTF event. 
 
But back to the original subject.... if you're relying on electronic devices to store your potentially life-saving information, consider having back ups and extra power cords and anything else you deem necessary to sustain this form in information.
 
Please leave comments or questions below or at: povertyprepping@yahoo.com
 
Thank you!
 
Susan

Wednesday, October 29, 2014

Canning pies

 
 I've been canning cobbler for a while, and we've been enjoying eating it, but this week I got the idea to try canning pie.  I still had a few bags of apples from this fall's harvest that I hadn't gotten canned yet, so I decided to experiment with some of them.

First I peeled and cut up the apples and mixed them with sugar, cinnamon, and flour.  I used about a cup of sugar, a Tablespoon of cinnamon, and half a cup of flour, and stirred that together first, then stirred it into the apple pieces.

I mixed up pie crust.  I used 4 cups of flour, a scant teaspoon of salt, and a teaspoon of sugar, which I stirred together.  Then I put in about half a cup of coconut oil (which is solid like shortening at our room temperature.  You can use shortening or lard if you'd rather) and a quarter cup of butter (you can use margarine, or just use shortening for this too).  I have a pastry blender but I never use it.  I just grabbed a sturdy table fork out of the drawer and mashed the coconut oil and butter into the flour until it was all even.  I had to turn the bowl a few times and stir some of the flour to the center so I could get it mashed in with the oil. 

When it was all evenly crumbled into the flour I poured in one cup of milk and 1/4 cup water.  I stirred it until it was mostly a blob of dough.  Then I used my hands to work the rest of the flour into it, packing it like a snowball instead of kneading it, though I did have to squeeze and work the dough ball some to get it all smooth and even.  They say if you knead or work pie crust dough too much you'll have hard crusts.  I wasn't sure it mattered in canning, but I tried to do it like I would for a regular baked-in-the-oven pie.

Now for the fun part.  I used wide-mouth pints because they have nice straight sides and I figured I could just run a knife around between the jar and the crust, and slide the pie right out.  I measured the diameter and circumference of the jar.  3 1/2" by 8".  I rolled out some of the crust and used a measuring tape and a stick to cut the dough to the that size.  I flattened a disk of dough and put it in the bottom of the jar.  Then I laid the crust in the jar, rolled around against the sides.  It immediately buckled and I had to use my fingers to mash it back against the sides.  I quickly spooned in some of the apple filling, packing it just a bit to work the apple pieces down in against each other, without packing it too tight.

I decided the heck with rolling it out.  I just took pieces of dough and flattened it some in my hands, then pressed it against the jar sides, working up from the bottom.  I mashed the pieces together to make a solid crust all the way around the jar, then put the apple filling in it.  Then I made another disk to put across the tops.

 
I didn't think to get a picture with the filling in the jars, and no 'top disk' of crust on them.  The three jars to the left are filled and have the crust on top.  The one on the right has the crust mashed against the sides, and I'm about to spoon the apples into it.
 
 
When I had all the jars filled I put a dab of butter on the top crust.  You can see that in the center of each jar.  I was already wiping rims and putting the lids on when I thought to take a picture.  The lids are in the pan to the right.  They had been simmering on the stove to soften the seals while I filled the jars.  Next they went into the pressure canner.
 
 
Apples by themselves can be canned in a water-bath canner, but I wasn't sure about a flour-based product like pie crust.  So I went ahead and used my pressure canner.  I canned them for 15 minutes (once the weight started jiggling) at 10 lbs. pressure.  We are at 3,500' of elevation, so I always can at higher pressure than people who live at low elevations.  If you're under 1,000' of elevation you could can this at 5 lbs. pressure.


These are the finished pies.  There were seven but we ate one and we gave a jar to our daughter and grandkids.  I didn't take this picture until this morning.  These definitely need to be labeled because I can see myself pulling one off the shelf and thinking "What in the world is THIS?"


Like I said, we ate one.  It had cooled a bit but was still warm.  I slid the knife around between glass and crust and confidently tipped it over the plate on the right.  The filling plopped out onto the plate.  I had to nudge the crust, then it fell out on top of the filling.  Oh well, I shrugged.  I divided part of the crust and part of the filling onto each plate.  My husband made hot cocoa and we sat down to enjoy an evening snack.
 
 
The filling was a tad sweeter than necessary, and since it was still warm, it was a bit syrupy.  It had soaked into the crust somewhat, but the crust wasn't really soggy.  It was like all of the crust was "the bottom crust", and not like the flaky top crust would be.  It was delicious.
 
Next time I try this I'm going to drain the apples better.  As I peel and cut them I drop the pieces into a big bowl of water with a crushed vitamin C tablet in the water to keep the apples from turning brown.  I'm also going to add a bit more flour for thickener. 
 
I also think if the pies were completely cooled they would thicken more.  Then I could dip the jar in hot water to help loosen the crust from the jar, since I can't get a knife under the bottom 'disk' of crust.  I'd still run a knife around the side to make sure it was loosened.  I had imagined a cylinder of pie sliding out onto the plate, which I could then slice. 
 
We're not very picky around our house.  Most of our family and friends have thought this would be cool.  Some have turned their noses up and thought I should just can the apples and make the pies 'fresh' as we want them.  But I think this is great because if we've worked hard all day and I'm tired, I have instant pie ready to serve.  If we go to town (60 miles to town) I can take our own healthy food to eat and bring along a pie.  They would be great for camping, or on long trips.
 
Some people freeze extra pies, but right now we don't have a freezer.  If you've read my other posts you know that our refrigerator died a few weeks ago.  We were using a small 'college' freezer after that, but now it's cold enough outside that we've unplugged it for the winter, as we do every year.  We have solar electric power and the days are too short and cloudy in the winter for running a refrigerator, and nature provides refrigeration for about 6 months up here. 
 
I have frozen pies in the past and I think that my canned pies are pretty similar to what you get when you thaw a cooked-then-frozen pie.  My mom would make up pies and freeze them without baking them, and the crust and filling were always kind of watery when she'd thaw and cook them.  I'm sure other people have had more success with that, because I see frozen pies for sale at the grocery stores.


Please leave comments or questions below, or email them to:
 
(and be patient.  I get so many emails it takes a while to answer everyone,
especially this time of year.)
 
Thank you
 
Susan


Monday, October 20, 2014

Preserving Vegetables, Grains, and Beans

Dave and I have finished and published our third book together.  The first two are "Preserving Meat, Dairy, and Eggs", and "Preserving Fruits, Nuts, and Seeds".  It took months of research, experimenting, and writing, and dozens of emails flying back and forth between Montana and Texas, but it was a fun project. 


Here's the blurb for the book from the Amazon website:
 

"There are a lot of books about food preserving but what sets this book (and the first two of this series, “Preserving Meat, Dairy, and Eggs” and “Preserving Fruits, Nuts, and Seeds” is that each food and all of the methods for preserving that particular food are described in their own chapters.
In Part I of this book it begins with vegetables and works it's way through each vegetable in alphabetical order. Then on to Grains and then Beans (legumes). All methods of preserving that work well with each food are explained along with directions for the preparation and processing of that food. There is also information about what doesn't work and why.
In Part II it explains the preservation methods and how to do them, and what you'll need for: Canning, Dehydrating, Freezing, Salting, Brining, Sugaring, Smoking, Pickling, and Fermenting, as well as some not-as-often heard-of methods: Ash, Oil, and Honey for food preservation.
Everything is something that the authors have personally done or tried, or in a few cases, spoke to someone who had. Both authors have been preserving food for about half a century, first as kids helping their parents, and then as adults (and parents) preserving food for their families. 
The authors live on opposite ends of the country (North and South) and bring some of their own regional flavor to the book, making it interesting as well as informative."
 
 
If you already own the first two this will round out your collection.  We hope it's a useful and helpful book.
 
Please leave comments or questions below, or email them to:
 
 
Thanks!
Susan (and Dave) 


Sunday, December 30, 2012

Dehydrating Eggs


Four dozen dehydrated eggs in a quart jar
 
A few years ago I started dehydrating my extra eggs over the spring, summer, and fall.  The main reason I did this was because from about November until March our chickens don't lay eggs up here in the cold north, with our short winter days.  We didn't like having to eat store-bought eggs during the months our chickens got their break from laying.  In the summer we gave eggs away to everyone we could push them off onto, and it seemed a shame to give away so many eggs, then have to pay to buy them in the winter, as well as buying feed for the chickens during those months too.
 
We live off-grid with solar electric power, so putting lights in the chicken coop isn't an option.  Winters are cloudy and the days are short, so we have to conserve electricity during those months. 
 
Dehydrated eggs have the disadvantage that you have to use them as scrambled eggs.  That means no fried eggs in the winter, but lots of really good and creative omelettes!  They can also be used in baking.  I use one tablespoon whole dried egg to 1 tablespoon water, to make one reconstituted egg.
 
You can also separate the eggs and dry the whites and yolks separately.  If you like to bake things that call for egg whites, or to make meringue, you can use the dried whites.  The dried yolks can be reconstituted and cooked for eating, or used in baking.
 
My Nesco dehydrator came with one plastic liner for making fruit leather.  I use it when I dehydrate eggs and I line the other trays with wax paper.  I cut the hole out in the middle so it would sit on the tray, and trimmed the edges with extra so I could bend it up and form a lip around the edge so the egg wouldn't run off the trays.  I'm careful with the wax paper and re-use it for several batches before having to cut fresh wax paper.
 
Each of these trays holds four eggs.  If you have a different dehydrator you can experiment to see how many it holds.  Break the eggs into a bowl and whisk them until the yolks and whites are evenly mixed, if you're dehydrating whole eggs.  With the lined dehydrator tray sitting on the dehydrator, so you won't have to move it after filling the tray, carefully pour egg onto the tray.  Move the bowl around the tray and pour until you have a good covering.  You can use a spoon to further spread it.
 
You don't want it too thick or it'll take a long time to dry. I poured mine about the thickness of a plain chocolate candy bar.  Try to spread it evenly so that you don't have part of the tray finished before the thicker parts.  It won't be perfect, but take a few minutes to spread it as evenly as you can.
 
This is partway through the drying process.  You can see the 'skin' forming on top.  Set your dehydrator to the hottest setting, if you have a temperature control on it.  Mine is 135 degrees.
 
You can dry eggs in the oven on a low setting, but use the absolute lowest temperature setting your oven has.  You don't want to cook the egg, you just want to dry it.
 
If you live in a dry climate you can air-dry the eggs.  Watch them closely and pour them thinly on the trays.  I tried flipping mine partway through once and it was a messy disaster.

It takes my dehydrator about 8 hours to dry four trays of eggs.  When they're done I lift the wax paper off the dehdrator tray and I turn it upside-down over a cake pan.  The dried eggs should peel off without leaving a mess on the wax paper, other than a few crumbs.  If it's still wet and slimey, put it back on the dehydrator tray and dry it longer.

When they're crumbled in the pan they resemble cornflakes.  I broke them into crumbles, then spooned them into the blender to make egg powder.

The finished egg powder is in the bowl.  I later started just packing the crumbles into a jar and crushing them down with a wooden pestle from a mortar and pestle set I have.  When reconstituted, it works just about as well as 'powdering' it in the blender.
 
It doesn't make a dry powder.  It makes a somewhat-greasy powder.  If you have trouble reconstituting it try using different temperatures of water.  It will look grainy when it's reconstituted, but when you cook it, as either scrambled eggs or omelettes, it comes out with an even texture and a bit spongy rather than fluffy.  The taste is the same as fresh eggs.

We take it camping, so I put some in a ziplock bag for that purpose.  This bag in the picture traveled with me on a 1,100 mile bicycle trip in spring and early summer 2010.

Dumped straight out of the trays and before further crumbling the dried eggs look like peanut brittle without the peanuts.
 
The majority of our dried eggs are packed tightly into glass jars and stored in our dark, cool root cellar.  Most summers I dehydrated around 24 dozen to store for winter use.  It's been a big savings and a great way to have 'home-grown' eggs over the winter.
 
If you have comments or questions, please leave them below or email me at:
 
Susan
 

Sunday, November 25, 2012

Dave's Kitchen - Brined Green Beans

When bringing in produce from your garden, there are times when you have more than you can eat but not enough to warrant getting out the tools and utensils out to process it.

Produce can be stored in the fridge until you have enough but but things like Green Beans can spoil if kept more than a few days.

Green Beans can be "Brined" and kept that way for weeks without spoiling.  That can preserve them until enough are gathered to work with.
 

Brined Green Beans

To brine the beans, wash snap, string or cut them like you would
when preparing them to cook or can.

In a crock, cooking pot or other container, put a thin layer of green
beans in, then add a layer of salt and repeat until the container
is full or you run out of beans.  Top with an additional layer of
salt. Cover the container and set it aside.

Fairly quickly the beans will start to "cry" and after a day or
so the beans will be "swimming" in a brine formed by the salt and
liquid that was drawn out. They can be covered and stored this
way for weeks.  Just make sure the level of the liquid
stays above the green beans. If the brine level drops, just add
water.

More beans can be added and layered with salt as they come
in from the garden until the container is full.  Again, just make sure the
level of the liquid stays above the beans.

When you get ready to prepare them for preserving or eating, drain
the brine and soak them in fresh water for several hours or until the
salt leeches out, and process them like fresh beans. They can be
dehydrated, strung to air dry, or canned. Just process them
and treat them like fresh.

Keep in mind that if the beans are left in the brine for too long, they
may start to ferment and become "Pickles". Theres nothing wrong
with Pickled Green Beans but they will need to be treated like pickle
and processed accordingly.


 The freshly snapped green beans in a bin
layered in salt.


 The same bin after it has sat overnight, the salt has drawn
the juices out of the beans and formed the brine.


This is not an indefinite long term method of preserving and store
your green beans but is a good process to be familiar with.


I have a fresh email from Dave about the beans:

 
Just a note about the green beans...
We had our Thanksgiving meal and one thing on the menu was Green Beans so I made up a batch of the ones that have been in the brine for about 10 days now. They were every bit as good(and crisp) as if they had been prepared fresh. I soaked them in fresh water overnight then lightly boiled and drained the water again, they cooked up with just enough salt to season them to taste.
 
I am leaving the rest of the batch in the brine to see just how long they will last before they start to pickle.
 
Dave...
 
I hope he'll let us know about the green bean brine-to-pickles process!


Friday, November 9, 2012

My husband's book

I can't believe I never made a post about my husband's book!  It came out in september, from Paladin press!
This is a very indepth book about our off-grid, self-sufficient life here in NW Montana, plus it has lots of pictures! 
 
It's a little pricey but the price was set by the publisher.  If you're interested in the book but it's out of your budget, watch the publisher's site because they run sales from time to time.  The last sale was 40% off.  I can try to keep track and let you know on here if I find out about a sale.
 
Here's the link to the book, on the publisher's website:
 
 
My husband has been writing for magazines for years.  His articles have appeared in Backwoods Home Magazine, Fur Fish & Game, Backwoodsman, Back Home, Traditional Archer, and Primitive Archer, and the now-defunct magazines Primitive Way and Modern Survival magazines.
 
He maintains blogs about our daily life at:
 
 
and at Grit Magazine's website:
 
http://www.grit.com/blogs/blog.aspx?blogid=4294968228

There's a lot of useful and interesting information to be gleaned there.


Saturday, September 8, 2012

New Book - Food Self-Sufficieny: Reality Check

It's here!


    More great information for preppers, homesteaders, and others who have a goal to work toward food self-sufficiency!  Find out what you'll need and how much, to produce and store your own food!  Read great tips from my own experiences.  A great deal, for only .99 on Amazon!

http://www.amazon.com/Food-Self-Sufficiency-Reality-Check-ebook/dp/B0097G797U/ref=sr_1_14?ie=UTF8&qid=1347456082&sr=8-14&keywords=susan+gregersen

Here's a list of the chapters in the book, so you can see if there's a subject of particular interest to you:


Table of Contents

Chapter 2 Jars
Chapter 3 Chickens
Chapter 4 Other Domestic Meat Animals
Chapter 5 Grains
Chapter 6 Foraging
Chapter 7 Hunting
Chapter 8 Fishing
Chapter 9 Conclusion

And here's the Introduction, copied and pasted from the book file.  It'll might help you decide whether to buy the book.


Introduction

     Often in conversations the subject comes up about growing or producing our own food. Some people want to move to the country and get into small-time farming, and some just want to have a garden. Others want to have a few meat animals around, such as chickens or rabbits.
    There are also those who want to work toward producing most or all of their own food. Some like the independence and some worry about future hardships, either from natural disasters or man-made events.
         But if you're going to grow a garden or crops, what do you need to do that? How much land? What type of land? How will you preserve and store the food you grow?
Animals need shelter and food. Do you have a place to put your chickens, rabbits, goats, calves, or other animals? What will you feed them if times are hard? How will you feed them now, if your goal is self-sufficiency? Will your plan include buying feed, or growing it yourself?
         In addition to gardening and raising animals, other sources for food self-sufficiency include foraging, hunting, and fishing. What supplies or equipment will you need to do these things? What laws will you have to follow, and do they allow you enough plants or animals to meet your needs.
         This books is about the numbers. It's not a how-to book, it's about what you need for the “how to”. We'll look at how to figure out how much space you need for gardens or animals, how many jars you'll need if you plan to get into canning, and what other options there are for storing food.
         I'll talk about animals and their needs, and suggest ways to feed and shelter them that won't break your bank account. I'll try to point you the right direction to find out what you need to know about foraging, hunting, and fishing, plus share some tips from my own experiences.
        This book is geared toward those with limited funds, but will also be helpful to more prosperous readers who are considering growing or otherwise providing for most or all of their own food. The 'how-to' may vary but the numbers are the same, whether you're rich or poor.
         Some people are 'preppers' and have been buying and storing food in case of hard times. It's a great plan, but knowing how to produce your own food is real security. Hand in hand with that is knowing what you'll need to produce, preserve, and store that food. That is what this book is about.
 
This book kind of snuck it's way from my mind and out my fingers on the computer keyboard.  It's not the second book I'd planned to write, and still plan to write.  But now that one will be Poverty Prepping, Volume 3, and whatever subtitle I give it.
 
So keep those stories and comments coming.  The winners of our prep items contest will be in the third book...the one that was meant to be the second book!
 
Susan

Saturday, August 18, 2012

HomeGrown Tea

Hi Everyone!  I've been buried under raspberries and peas.  We've been picking around 2 gallons of raspberries a day, and a lot of peas.  I've also been harvesting herbs and drying them.  Some are for various medicinal complaints that might arise, but our favorites are for tea.

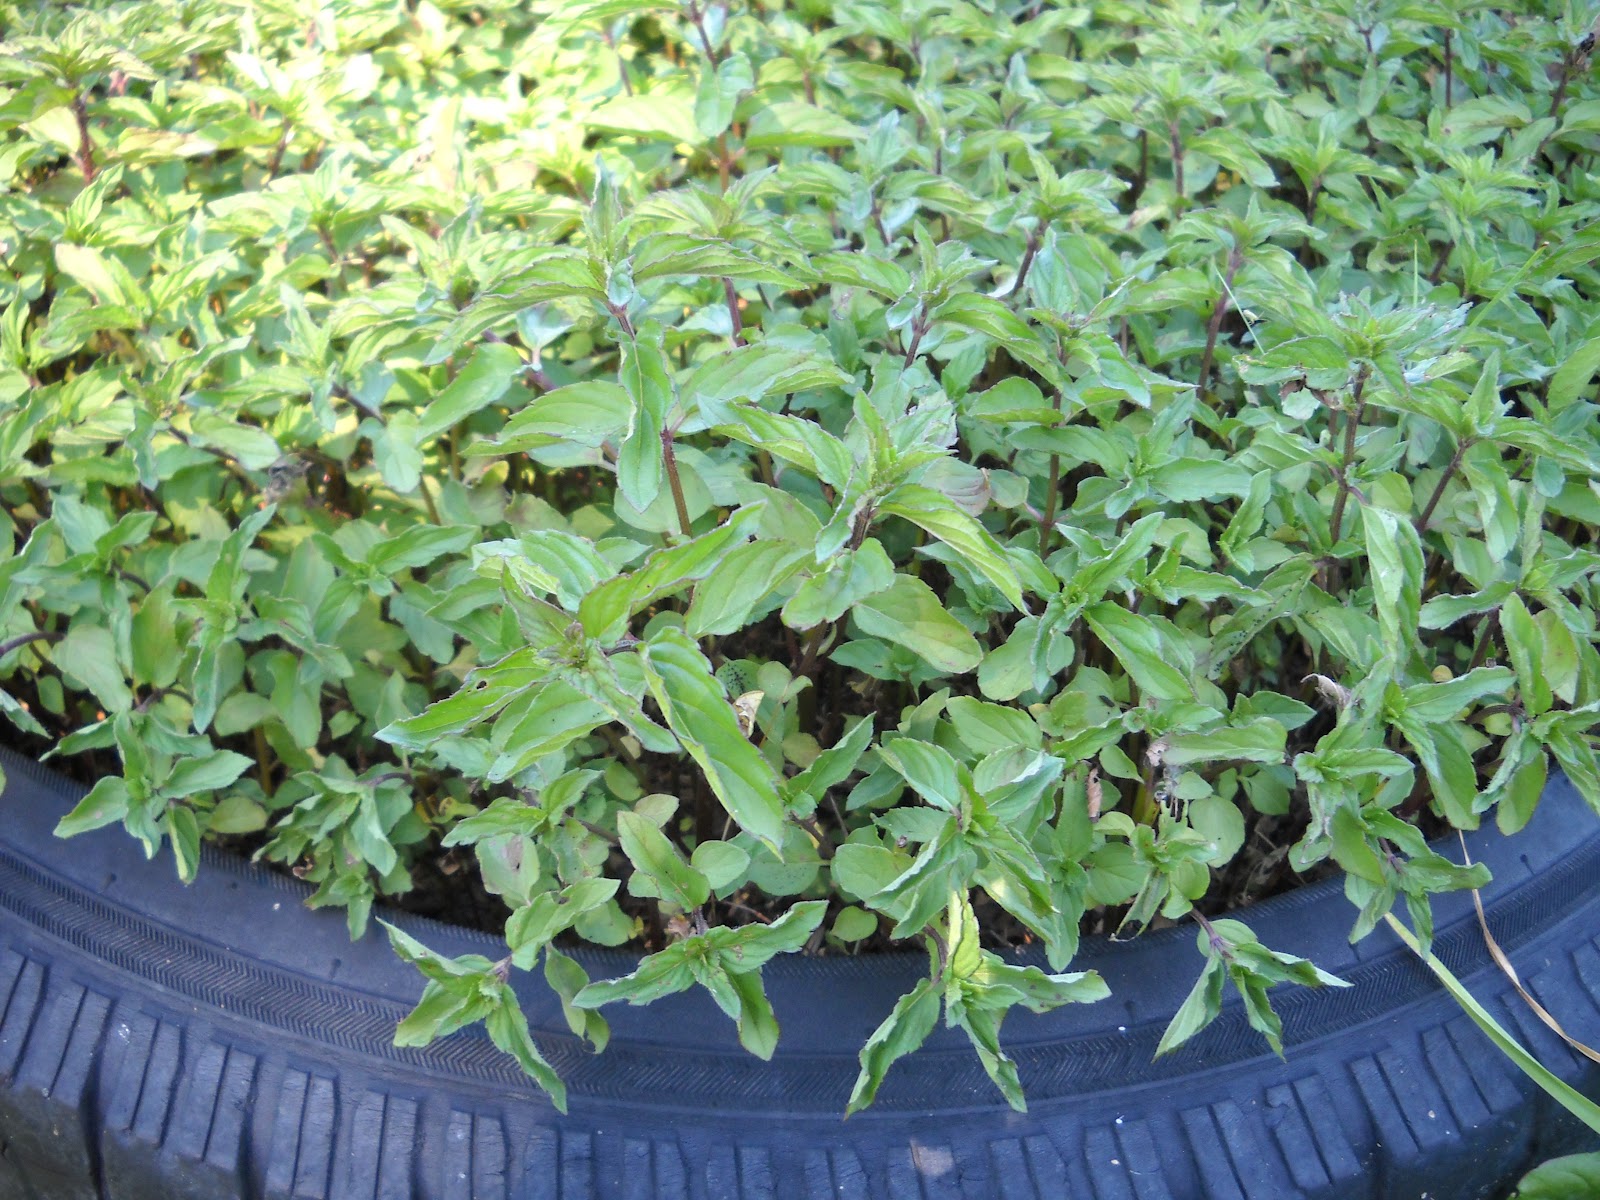
Mint is our favorite homegrown tea.  It makes great iced tea as well as hot tea, but on a summer day nothing is more refreshing than mint iced tea.  Just straight mint leaves, fresh or dried, steeped in hot water, then add cold water.  You can add sugar or honey or your favorite sweetener if you prefer it sweetened.  I grow it in tires since it spreads out and takes over.  The mint in this picture was cut a couple weeks ago and is growing again.  In our climate I can cut it three times a year if we get enough rain or I keep it watered.

Since sugar has gotten so expensive we've started drinking it plain.  It took some getting used to, and sometimes I still add sugar.

Another tea herb we grow is lemon balm.  Besides using it for a pleasant, relaxing tea I planted it because if this old world ever does have some sort of catastrophe, we'll have something we can grow here in the north that smells like lemons.  It's something I would miss.

Some wild plants you can use for tea, and that grow in most parts of the United States, are clover (especially Red Clover), Roses (the rose hips are the part used for tea), and Pineapple weed.  Pineapple weed is a member of the Chamomile family.  They grow in hard-packed ground, such as the gravely areas along roads and sidewalks, sometimes out of the cracks in sidewalks.  They have a strong Chamomile smell and the flowers look like chamomile flowers with all the petals pulled off.  Pineapple weed never gets the petals.  They just look like little pineapples sitting atom the stems.  The stems are anywhere from a few inches tall to a couple feet tall, or for our foreign readers, they're about ankle-high to knee-high.  Pictured here is Pineapple weed.

When I harvest plants, either wild or domestic, and intend to use them for tea I pick or cut them, then spread them on screens to dry. If you cut something such as mint that has grown tall, you can tie them in bundles and hang them in your house to dry.  We live in a dry climate so it only takes a few days for spread-out herbs to dry.  In humid climates it will probably take longer.  I don't have experience with drying plants in a damp climate, so if someone would like to share stories about that, I would appreciate it. 

Mint, left, drying on screen.

Once the herbs are dry I store them in air-tight glass jars.  You can store them in plastic bags or bottles but over time they can pick up odors or they can oxidize since plastic is somewhat porous, although it seems air-tight.  If I know I'm going to use them before the next season's harvest I go ahead and use plastic if I need to.  I prefer glass jars.

I save every glass jar we get, which on our budget, isn't very many.  But we do occasionally buy a jar of Salsa or something else that comes in a glass jar, so I wash them out and keep them.  Peanut butter and Mayonaisse used to come in glass jars but now they're hard to find in anything but plastic... at least around here.

These are Rose Hips (right).  After roses are done blooming they form a small fruit that looks like a little apple.  These are the 'hips', and I don't know why they are called hips!  All roses and the hips are edible, but be sure the plant(s) you harvest from haven't been sprayed with things like pesticides or herbicides.  It might also be safer to avoid those that grow along busy highways.  I haven't heard if fumes from vehicle traffic presents a health hazard if you eat these plants and their fruits, but unless you're truly starving and can't find plants away from highways, pass them up just in case.  Perhaps one of you readers have information on this.

To make tea with the hips you can crush and steep them.  Some people remove the little hairy seeds inside them first.  Just as a matter of interest, you can make jelly with the hips, too, if you're a jelly-maker.

Pictures on the left is white clover.

 Here's an interesting tidbit about white clover. I don't know if it applies to other kinds of clover, but you can dry the white clover heads and grind them into flour. It can be added to regular wheat flour for variety in nutrients, or to extend the flour to provide more meals. This is useful information if times become very desperate. This was done during the famine in Ireland, among other times and places.


This is purple clover, and there is also Red clover, but I couldn't find any around my yard toay.  Clovers are edible and medicinal, but we'll cover medicinal in another post.  When you pluck a clover flower you can suck the bottom of the flower and there will be a small drop of honey-like sweet fluid.  It would be interesting to know if a person could make their own syrup-like sweetener by any process or extraction, at least one a person could do for free in their home.  Meanwhile, you can make a delicious slightly-sweet tea that you can drink hot or cold.


Other refreshing teas can be made from such plants as Raspberry (picture), Strawberry, and Blackberry leaves.  They won't have the faint berry-ish taste of commercial teas in those flavors, but you can mix them with other tea plants such as rose hips for more variety.  The bottom line is finding delicious, healthy foods that are free.  Many areas have wild berry plants, especially in wooded areas or along creeks and rivers.  The berries are delicious too!  If they're in season while you're harvesting leaves for tea, pick some berries and add them to your tea.  Crush them in your hands and either just squeeze the juice into your tea, or smush them up good and toss them in!                                                                                                                                   


Plants with leaves, such as mint, can be stored whole, or you can strip the dry leaves from the plants to save space in the jars or bags.  The sticks and stems won't hurt if you choose to leave them in, but the leaves are mainly what you are after.  In this picture I have been stripping the leaves, packing them into the jar, and making a pile of the sticks in the lower-right corner of the picture.

I admit to still being in the learning process myself, so I have shared with you what I know, while admitting what I don't know.  Comments, suggestions, and any information you wish to share are helpful.  We can all learn together.

As with all plants, both wild and domestic, make SURE you are certain the plant is what you think it is.  If you have any doubt, find someone reputable that knows the plant and ask.  In most places you can pick a sample of the plant and take it to the county extension office and they'll tell you what it is.  Please be careful as you learn.

Comments:

"I live in N Central Texas, which has become quite humid over some years, and how I dry my tea (and other) herbs is in brown paper bags. The herb must be completely dry and the bag as well, with nothing else in it. If I am hanging the herb(s) in bunches (like Yarrow), I put them in the bag, top down, and tie a tie around the top of the bag and hang it in the driest place I have. Otherwise, I put the herb in the bag, roll the bag down at the top, clip it and set in a dry place. This has worked very well for me.

And thank you for your lovely blog. :)

MtWoman"

Received via email Tues. August 21, 2012.  Thank you, MtWoman!  I'm guessing the paper bag wicks moisture away from the plants as they dry?  It's wonderful to get this tip from someone who lives in a humid climate.