Showing posts with label self-sufficiency. Show all posts

Friday, September 26, 2014

Life without refrigeration

This post is a supplement to my book, Life Without Refrigeration .  I described some of the ways we cooled food over our many years in different places with no refrigerator, and recently I started collecting my pictures of some of those things into a folder on my computer.  I have enough of them now to make a post so the readers of the book can see what I was talking about.  I may make a second post if I find enough pictures of other things we did.
 
Twice I've been part of hand-digging a root cellar.  The first was in SE Kentucky in the 1999.  I used a pick and a shovel and dug out a hole in the hill behind our house.  We lived "at the head of the holler", the last house up the draw, half a mile past the last other house.  The electric meter was at the foot of the hill and the power line was strung for half a mile on tree limbs and even on the ground in places.  The power at the house was too weak to run a refrigerator.
 
This is me starting the root cellar hole.
 

There's my root cellar hole 'in progress'.  Ignore the kids, they're taking turns cutting the grass
with a weed eater.  I worked a little bit each day on digging the hole.

I finally realized that I wasn't going to get a nice big hold that I could build shelves and bins in.
So I took our old kitchen table and set it in the hole to make a "roof".  I used boards (not the ones shown in the next picture) to cover the sides so dirt wouldn't slide in there.  They were old pieces of plywood that I jammed into the dirt on the ground and up against the side of the table top.  The back-filled dirt held them in place against the table.  Ignore the girls.  They used it as a playhouse for a few days.

The finished "root cellar.  I jammed posts in on the front and put log pieces and rocks along the sides to hold the dirt in place.  I used an old door, an old wash machine lid, and a feed sack to block the front and keep heat out.  We were truly poverty and had an income under $5,000..... per year.  But we did what we could to make life more comfortable.
 
In this root cellar it was only big enough to set a big cooler in there.  We froze water in gallon jugs in the freezer of the refrigerator at the little mission church a mile and a half away.  On Sundays and Wednesdays we would walk to church with two empty gallon jugs.  We'd fill them at church and put them in the freezer.  When we came home we would carry the two jugs that had been in there for a few days, freezing.  When those thawed we used them for drinking water before they were carried down again to be filled and frozen.  We had three sets of two one-gallon jugs so two were always in the freezer, two were always in the cooler, and two were being used for drinking water.  (We also got water from a spring).
 
The second root cellar we dug was a bigger project, in NW Montana in 2003.
 
Those are the same four kids that were the little kids in the pictures above, plus my husband in the center.  (I married him in 2002.  I was on my own in Kentucky).
We selected this hill about 100' from the log cabin we bought and moved to earlier that year.  It was three miles from the power line and the cost to run power would have been $27,000 dollars.
We dug the root cellar so we would have a place to keep canned goods and potatoes, carrots, and other root crops from freezing.  But it was also nice in summer for keeping food cool.  Produce and bread (in mouse-proof containers) would keep longer in summer.  We also kept pitchers of water in there for making "cool" tea.  When it was 95 degrees the 55-degree water felt pretty cool.
 
The dirt was chopped with picks and then shoveled out.  We took turns.  Someone would chop up dirt for a while, then get out and rest while someone else shoveled it out.  After a point it got to where the dirt was shoveled into buckets and lifted out to another person who would dump it.
Initially we dug it about 5' deep, and about 6' (front to back) by 8' (side to side).
A few years later we dug the floor down another foot, for more head room.
As you can see, we laid logs on each side of the hole, then put old boards across those. We also had quite a few old wooden doors that we laid over the logs.  Next we covered that with 6-mil plastic sheeting that we bought at Home Depot.  We carefully shoveled about a foot of dirt onto the plastic, then put another layer of 6-mil plastic sheeting over the growing mound.  Then we shoveled all the rest of the dirt onto it.  The reason for the plastic was to help shed water and snowmelt so it wouldn't just soak through and drip inside the root cellar.  After 11 years it is still dry inside.


We chopped steps into the dirt for access down into the root cellar and framed it in with old boards.
Then an old door was put on with hinges.
 
 
Here is the root cellar the next spring.  We added a piece of corrugated metal above the door to funnel rain and snow away from the top of the door.  Snow had worked it's way up under the top of the door and dripped in onto the steps. 
One thing we never did was to add venting.  The doorknob hole in the door is the only place air could get in an circulate.  That didn't cause a problem for most things, since potatoes and carrots love a moist environment.  We did have a little trouble with rust on jar lids, but as long as the jars weren't in there more than a year or so, the rust was surface rust that scrubbed of well in the dish water.  A good case for using and rotating one's food storage!
The other problem is that it is too cold and damp to store onions and squash for a long period.  Those are stored in a back room in our cabin instead.
 

Looking down at me.  Those are milk crates full of rutabagas and turnips by my legs.  There are shelved floor-to-ceiling behind and to my right in the root cellar room.
 
 
This is the same root cellar today.  As in, literally today, five minutes ago.  The old mattress next to the door is one that we usually keep over the door, and flip it to the side when we go in.
It insulates the door from summer's heat, and in sub-zero weather it helps keep the 'warmth' in.
Summer temperatures in the root cellar are usually between 50 and 55.
Winter temperatures are usually around 35 to 40.
It's been in use for eleven years.


Neither root cellar, in Kentucky and in Montana, cost anything to build except our time and sweat other than the plastic sheeting in Montana,
 
 
Other times when we find ourselves without refrigeration are when we go camping.  Normally people take coolers and ice.  But when we go camping, it's sometimes for a couple of weeks or more in the back country.  We take a lot of dehydrated and canned foods, but even some of the canned foods have to be kept cool once they're opened. 
 
Since we are mainly in the west where the air is dry, we're able to use evaporative cooling for some things.
 
This is a jar of cream cheese.  The cream cheese was at 'room temperature' on a 75-degree afternoon when we opened it.  I set the jar in the shade and laid a small thermometer on the jar and covered it with a wet washcloth.  I returned from time to time and poured a little bit of water on the wash cloth to keep it wet.  A few hours later the thermometer read 57.  That's not safe enough to keep most food from bacterial grown, but with cheeses, butter, and condiments you can do this for a short period of time, usually a day or two depending on the cheese and how wet you keep the cloth, and what the outside temperature is. 
The breeze (even if it doesn't seem to actually be blowing) cools as it evaporates the water.  I've known of off-grid people who use this theory in their homes by pinning wet sheets over the outside of open windows to cool their homes.  Free "air conditioning". 

This is only sitting in the sun momentarily while I took the picture.  Under the towel, sitting on an inverted bowl in an enamel pie pan, is cheese, butter, and a container with 5 eggs in it.
There is water in the pie pan and the towel is wet.  The towel wicks water up from the pie pan and keeps it wet.  I still walked by now and then and poured a little water over it.  The upside-down bowl in the center kept the food up out of the water.  When I open a stick of butter I drop it into a small canning jar to keep it dry.  The cheese was in a ziplock bag.
It was February in the desert of southern Nevada and the days were in the 50s, the nights in the 30s.  We had no problem keeping these foods cool enough with this method.  However we did not try to keep meat or milk in these types of conditions.  We used powdered milk and canned meat.
 
 
We often 'boondock' camp around the north end of Lake Mead (SE Nevada).  In the winter and spring the water cools into the 50s, and then 60s.  It's a great place to keep drinks cool.  I put cans and bottles of pop and juice in a nylon stuff bag and used a piece of baling twine to keep it from drifting out from the shore.

Other times we tied jugs of water to an old tired (left there by someone besides us!) and let them float out in the water, for making 'cool' tea.  That 55 to 60 degree water tasted pretty good when it was around 90 degrees at dinner time.
 
 
Sometimes we did use a cooler with ice.  I don't like my food floating in melted ice water, so I have two half-gallon water-tight containers with wide mouths, and I dump the ice in there when we buy ice.  It keeps the cooler cold without having my food ruined by the meltwater.
Sometimes we dig a hold about a foot deep and set the cooler in it and bank the sand or dirt back up against it.  Then we get an old sheet or blanket wet and put it over the top of the cooler.  That'll make the ice last more than twice as long.  But if we're only camping for a day or two we just make sure the cooler is always in the shade.  We move it from one side to the other as the sun moves.
Why in the world most coolers are dark colors is beyond me.  The sun heats them up and melts the ice faster.  Next time I need a cooler I'll buy a white one no matter what!

I'm shaking my head looking at this picture.  I left the cooler sitting OPEN!!!  At least it's in the shade, but I shouldn't have left it open.  This was a day trip, so I probably wasn't as concerned about keeping the ice for very long, but still.  I can't believe I left it open!  :)
 
Like I wrote in the book, there are many ways to keep food cool without a refrigerator.  But you have to be very careful of which foods you allow to be stored at warmer temperatures.  Never use milk or meat that hasn't been kept cold (as in below 35 F.or so), or that isn't preserved by a safe method. 
 
If you're interested in looking closer at the book, click on the link below the picture.


The purpose of this post isn't to sell books, it's to provide some pictures to go with the text of the book.  I hope they will be interesting and helpful, with or without the book.
 
 
Please leave comments or questions below, or email them to:
 
Thank you. 
Susan


Tuesday, October 29, 2013

A visit with Dave...in person!

Earlier this month we went to Texas to meet with Dave and look things over and plan out our next book in the food preserving series and a few other projects we thought up.
 
A lot of the conversation was about our various food preserving experiments.  Dave's house is like a museum of food preserving and it's results.
 
Cooked, dehydrated, and vacuum-sealed sausage patties.  He sent some of these home with us and we munched on them in the car.  Delicious, and no one got sick.  I don't remember how old he said these were, but he'd eaten some that were older and never gotten sick.

Christmas pudding, which is essentially fruitcake. 
It's from last Christmas...almost a year ago.  It was tender and moist when we opened it and sampled it.  I just recently found out, while doing the "Beets" chapter in our upcoming book that some of the 'fruit' in here was actually beets!  They had been canned with sugar, then dehydrated a year later.

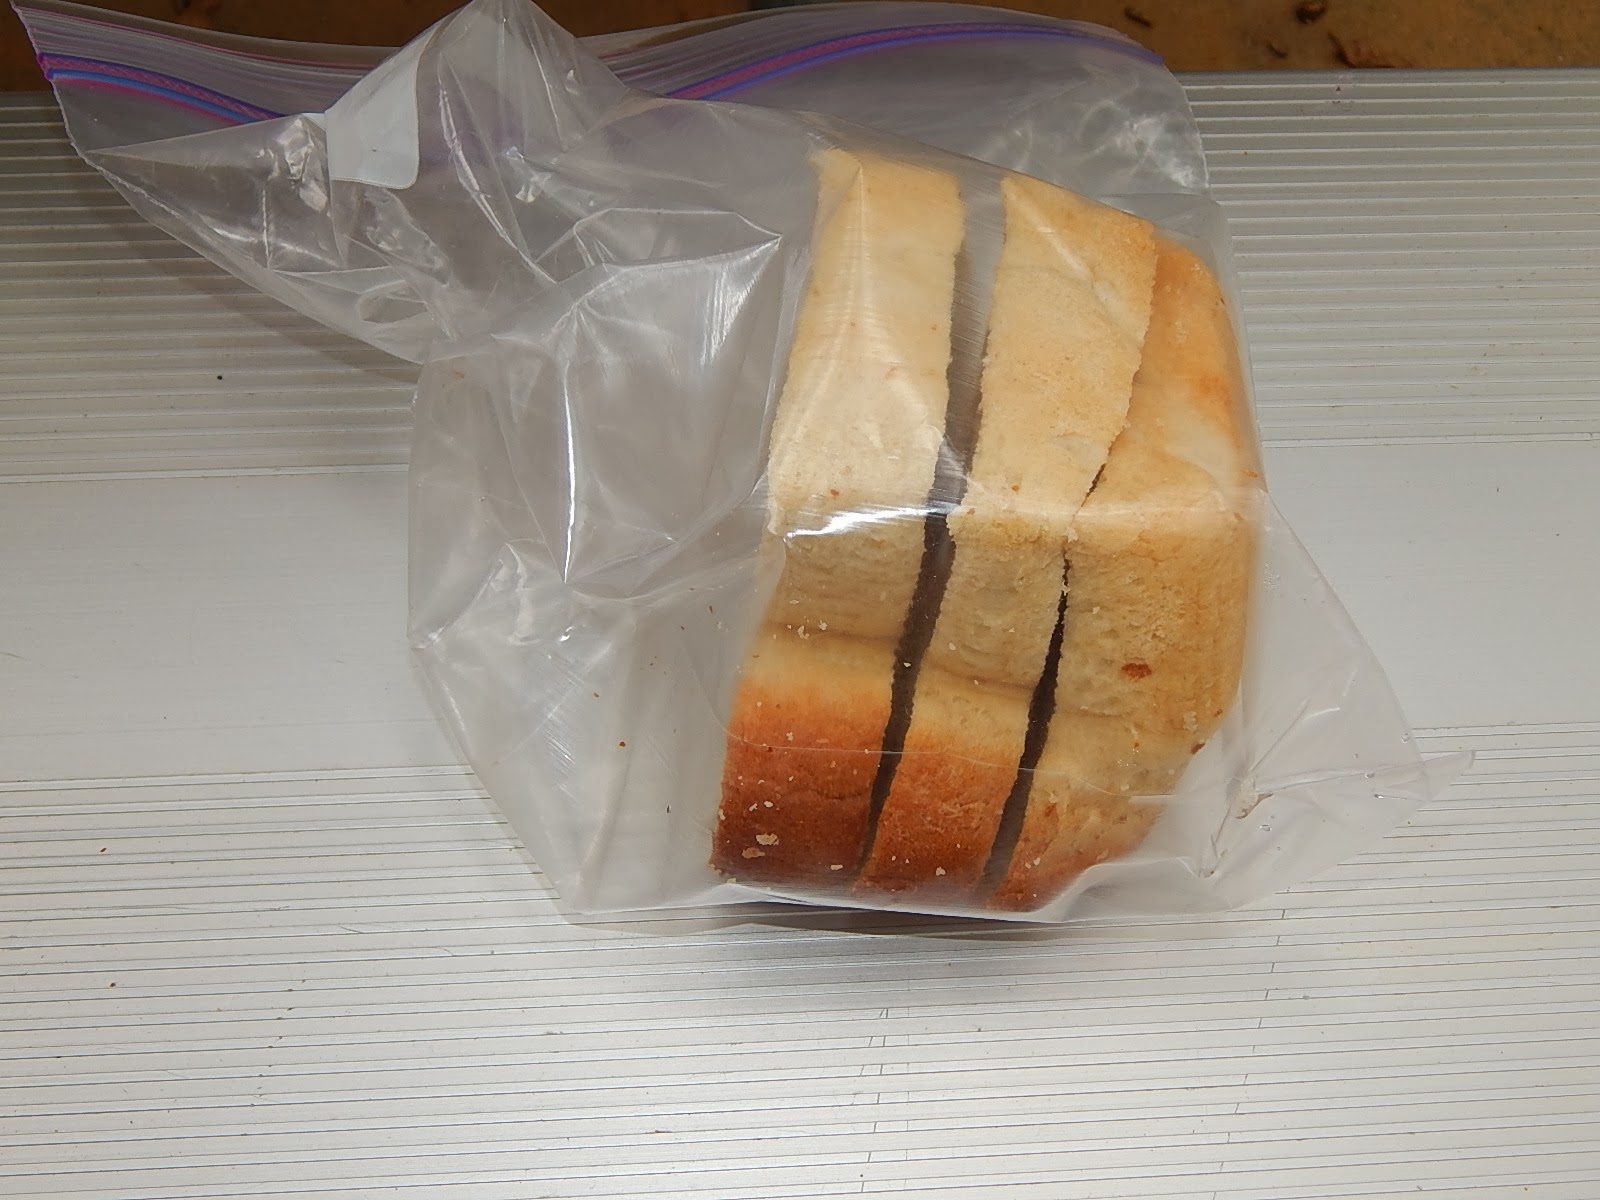
Homemade bread that Dave made. 
I think it had acorn meal in it, but it might have been the other
homemade bread we had while there.

Dehydrated slices of cheese.  This was an experiment I asked Dave to do last winter while we were working on the our book Preserving Meat, Dairy, and Eggs

Pound cake. 
It's interesting to me that it doesn't scorch on the outside against the jar. 
What a great way to have instant desserts!

Pickled cactus.
Texas is a cactus paradise.  If the world falls apart, they can eat off those cactus
that grow like weeds all through the woods and roadsides!  What a wonderful bounty of foraged food.

Watermelon syrup.
We wrote about this in our book, Preserving Fruits, Nuts, and Seeds
I never heard of watermelon preserves, watermelon syrup, or candied watermelon
until I met Dave.  He wastes nothing on a food he's working with.

Cream of Chicken soup
Can you imagine even thinking of dehydrating cream soups!  Brilliant! 
I'm a big fan of dehydrated foods because they take up less room and I don't have to worry about them freezing.  I should be opening cans and dehydrating things, one after the other, to eliminate the risk of losing food to freezing.  We heat our cabin here in NW Montana with firewood and the back rooms get pretty cold when it's below zero.  Dehydrating food is a great answer to the problem
of canned goods freezing.

This lid says "parsley" on it, and below that it says canned greens.
It's dried carrot tops that Dave sprinkles in soups and stuff like dried parsley.
Another one of those "Who would have thought?" moments!

Chili with beans
This really is chili.  Complete chili, cooked, put in a food processor, and dried. 
He cooked some for us, only he also added some cooked, dried beans to give it
some 'texture', even though there are beans in the chili in the jar.  It's not chili powder. 
It's powdered chili, the soup!

Leftover Spaghetti
Leftovers often get canned in Dave's house.  He has a refrigerator, but it's more likely to be used for food waiting to be preserved or ingredients for experiments.

Ginger juice
Dave makes this as a stomach ache remedy.  I can't remember how he said
he made it, so I'll check with him, then edit this post.

Canned velveeta
Dave's version of canned cheese.  Looks just like mine, only I use cheddar cheese. 
We have a post on this blog that gives directions for canning cheese

Bacon Fat
When Dave gets enough of it, he cans it to preserve it.  Then it's handy when
 he needs it, without taking up space in the refrigerator.  He stores it where it's
dark and cool so it doesn't get a rancid flavor.

Watermelon preserves
Another one of the ways he uses watermelon.  His candied watermelon rinds are
excellent too but I don't have a picture of them.

Fresh acorns on the left, acorn meal on the right.
This is one of the processes we described in Preserving Fruits, Nuts, and Seeds .
I know I'm putting our book links in here a lot today.  We put a lot of free information on this blog, but we also spend months working on the books we publish.  You can continue to read whatever is on this blog for free, but some things are just in the books.  It's only fair to hope for some sales to compensate for all the hours of preserving, experimenting, taking pictures, and writing.  But no one is under any obligation to go buy the books.

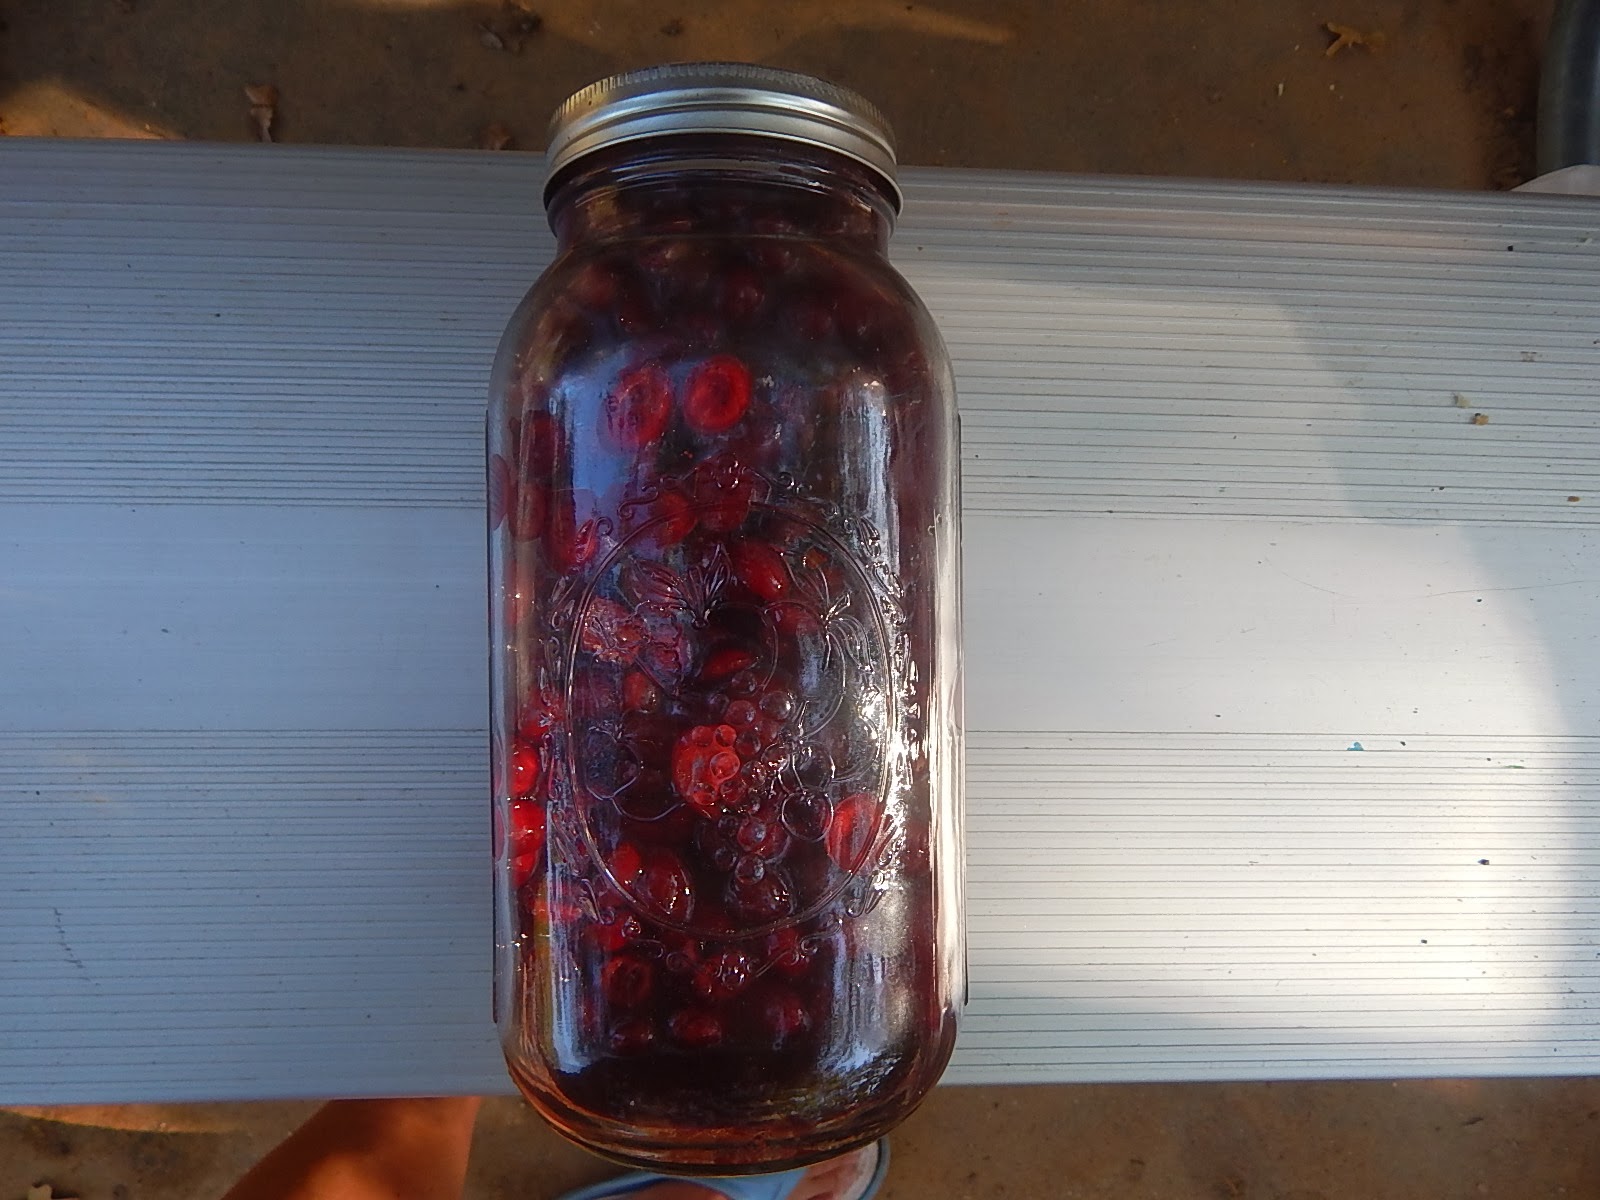
Pickled Cranberries
This is the best of all!  I love Dave's pickled cranberries, better than the recipe I had!
He gave us this half-gallon jar and another one that was still half full.
I lived on those and the dehydrated sausage on the 3-day drive home!  Mmmm-mmm!
(They're in the Fruit/Nut/Seed book)

Chicken Nuggets
Say....WHAT????

My jaw dropped.  Dave canned chicken nuggets! 
He used the dry-canning technique for meat...and made canned chicken nuggets! 
 I am SO going to  try this!  What a great food to have on hand, especially if you don't have refrigerator.  Here on our off-grid homestead I can see these being
a huge treat when the grandkids visit!
 
 
I feel especially blessed to have a friend like Dave.  His hard-working and peaceful nature make him a pleasure to be around, and his knowledge of gardening, food, and food preservation is a wealth in itself.  We loved spending time with him and his family, who are every bit as wonderful as he is. 
We consider them family, and I hope you do too.  Thanks, Dave.
 
Please leave comments and questions below or at povertyprepping@yahoo.com
 
Susan
 
What?  You're asking if I took a picture of DAVE while I was there?
 
It depends.  Do you mean before, or after, midnight?
rotfl (rolling on the floor laughing!)
 

Sunday, October 27, 2013

Chainsaws and firewood-cutting


We heat with firewood in our cabin, and both my husband and I have heated with wood for most of our lives.  We love the way the heat radiates from the stove and soaks into our bones.  It's also a nice place to set our tea kettle so we always have hot water ready for hot chocolate, coffee, or tea. 

Here in northwest Montana that's possible most of the year, at least in the morning.  Even in the summer we have at least a small, quick fire to take the chill off the cabin, and it's usually enough to get the water in the tea kettle hot.  Often in the summer I gather pine cones from the woods around our house, and we burn those instead of "real" firewood for those short fires.

But we still need several cords of firewood to get through Fall, Winter, and Spring.  That means a lot of hours up in the forest with a chainsaw or two, cutting and filling our truck with wood.  Our old Dodge one-ton truck will haul about a cord of wood at a time, sometimes more depending on the wood and how dry it is.  Green wood is much heavier because it has a high water content.  So-called 'green' wood means that it hasn't dried out yet.  It's fresh. 

Even dead wood doesn't all weigh the same. I always knew my husband preferred the heavier, dense wood like Larch or Fir (western woods.  Back east it's probably Oak and walnut?) but I didn't really know why.  He said it was better wood, that it would burn hotter and keep us warmer in the coldest parts of winter.  He was right.  I could tell the difference both in how warm the cabin was and by how often we had to feed the stove compared to burning other wood that time of year.

If we have wood of lesser quality, such as Lodgepole or Aspen, we burn it in the spring and fall when it's not so cold outside.  Wood like Aspen leave a lot of ash and we have to shovel the stove out a lot more often, whereas with Larch there's almost no ash in the stove. 

Even though I grew up helping my Dad cut firewood, and then helping my husband cut firewood, and also some expeditions on my own to cut firewood, there were a lot of things I didn't know.  For one thing, I never dropped a tree (cut down a standing tree) because my Dad and my husband always were so grave and serious about the dangers of doing so.  I figured it was just some sort of macho guy-thing that only they could drop a tree safely.  But I decided to just stick to cutting up trees that had blown down, and it's a good thing because it turns out there are a lot of dangerous things I wouldn't have thought about, and I probably would have gotten hurt.  Or worse.

Usually when we are cutting together my husband drops the tree (unless we're cutting up fallen timber) and I help him cut the limbs off with my smaller chainsaw.  Then he slices them into stove-size pieces and I start carrying them to the truck.  When we get home we throw them out on the ground in front of the woodshed.  The ones that don't have to be split are stacked in the shed, and my husband works on splitting the rest, a bit here and a bit there.  He loves splitting wood and is good at it.  He always seems more chipper and with a lighter step after he's been out there splitting wood. 

Over the past several months my husband has been working on a book about the subject.  It's a thorough book, starting with how to choose a chainsaw, how to buy a chain for your saw, how to maintain the saw, how to cut firewood, including choosing wood (which is where I learned that Larch has a high BTU rating among woods in our area, and that's why it puts out more heat for less amount of wood burned), how to fell trees and what/why the dangers are, how to split wood, and how to sharpen (file) the chain, how to adjust the chain, how to mix the fuel...now I'm getting things out of order as I remember the subjects in the book, but let's just say it's a very complete book about chainsaws and cutting firewood.  I know.  I helped edit it.  It also has a lot of good pictures, carefully labeled, and they're in color on the kindle version.

The print book won't be out until the end of the week, but in the meanwhile, you could curl up and read this kindle version of a very good book.  Even if you're not going to cut wood, this is an interesting book.  My husband is interesting and you'll feel like you know him and more about our lives after you read it.  He included some funny stories about mistakes he made while cutting, including what happened after he sawed off a limb he was standing on, up in a tree!  No, he wasn't on the outer side of the cut, but it's still funny!  He is a good man who learns from his mistakes and keeps a good attitude.  I'm proud of him, and his book.


Saturday, October 26, 2013

Dehydrated butter and 'butter' substitutes


The wonderful flavor of real butter is something I would miss if I couldn't buy it at the store any more, or had no one to trade for, to get butter or the makings for it.  We have been canning butter for the last few years and I had a can of freeze-dried butter put away.  But when Dave and I were working on the book, "Preserving Meat, Dairy, and Eggs" (http://amzn.to/10YAdpA) Dave experimented with dehydrating butter.  He used real butter mixed with powdered milk, since dehydrating just butter didn't seem to work.  It made a passable spread, but we still wondered if there was something that would work better.
 
Earlier this month I had the opportunity to visit Dave in Texas and we put our heads together to get ideas, and created a test 'assignment' for each of us.  Mine was to try to make a dehydrated butter spread out of sour cream and butter extract.  We'd already learned that certain dairy products such as sour cream, yogurt, and cream cheese dehydrate very well.  What if the sort-of bland taste of sour cream, mixed with butter flavor, would make a good buttery spread when re-hydrated?
 
I assembled the things I would need.  I have the sour cream (right), butter extract (the bottle laying next to it's box, center), parchment paper (center), and a drying screen from an old dehydrator.
 
I spooned about half a cup of sour cream into a bowl and made a well in the middle of it.  You have to look close to see it but there is about a tablespoon of butter extract in the middle of the well.  It's a clear liquid but it has a strong butter smell.
I thought of using yellow food color to make it look more like butter, but I decided not to.  I intended to add a little salt to help simulate real butter but I forgot to add it before dehydrating.

I spread the mixture on parchment paper, then laid that on a drying screen.  I tore the parchment paper in a crooked jagged line but decided to use it anyway, rather than waste it by throwing it away.  Then I set the drying screen on shelf brackets behind our wood stove.  Up here in Montana we're already using it to keep the cabin warm, with nights in the 20s and days around 40.  The dry heat from the woodstove does an excellent job of dehydrating in our off-grid cabin.

The next morning it was dry, and over-dry in some places. 
 
 I slid the crumbled pieces of dried sour cream into a cake pan, then into a jar.  I took a piece and nibbled on it.  It tasted like cream cheese!
 
I put a few pieces in a bowl, added a little bit of water, then mashed it with a spoon until I had it mostly mixed with the water, then tasted it.  Yup...tasted just like cream cheese with a buttery twist.  It had that 'twang' to it that sour cream, cream cheese, and yogurt all have, which is not a prominent flavor in butter.  Well, I thought it would still be very good spread on bagels or other breads.  We used some on mashed potatoes that night and it was really good.  But it still was not what I considered a good butter substitute. 
 
I never did add the salt, but it might have helped bring it closer to 'butter'.  However, I don't consider it to be a success as a butter substitute.
 
Meanwhile, in Texas....
 
Dave was experimenting with plain yogurt, which he made himself. 
 
"Well Sue, the butter flavored yogurt is dried and it tastes like butter flavored yogurt, lol!  Its not at all bad, would be great on a baked potato or maybe even pasta, and as you said (with the sour cream), would be great on a bagel.

I don't think that it could be called a butter substitute but it is definitely worth keeping the idea around for use if the opportunity presents itself, I'm going make another batch of it and I can send it to you if you would like."
 
So we still don't have a workable dried butter substitute.  The closest we came is Dave's recollection of the experiments he did last winter with powdered milk:
 
"I was digging through some of my old recipes and came across the experiment I did last winter.  I made a spread that can be used as a substitute for butter that's made from "Nido" whole milk powder.  It came out well enough that I thought it would be useful if our jars of canned butter ever ran out.
The basic recipe I came up with is 1 1/2 cups Nido whole milk powder, 1/2 cup oil, and 1/2 cup water, blended well until all the lumps are smoothed out and the oil is well mixed.

The resulting spread can be flavored with "Butter Extract" to give it a buttery flavor.  About 3/4 teaspoon will work, or you can add a stick of real butter instead and use it to stretch the supply of butter you have.  (Susan's note: If it were me, using the extract, I'd add some salt too).
The butter extract can be kind of pricey, so I tried making it with butter-flavored popcorn oil, and not adding any other flavorings.  That came out pretty good too.
 
Another thing I tried doing was to use skim milk powder instead of the Nido, but that didn't impress me too much.  It came out rubbery and had a strong 'powdered milk' taste, even with a full teaspoon of butter extract added.

 I used the substitute to make a box of mac-n-cheese (Kraft) and it worked great.  It wasn't all that good spread on toast but it'd work in a pinch.  Out of all the things I used it on, I think the best was the mashed potatoes.  It really surprised me how well that worked out.
 
And finally, an excerpt from the book Dave and I wrote, mentioned at the beginning of this post:
 
Dehydrating Butter:
This is done commercially, mainly as freeze-dried butter. It can be gone at home but the finished product is more of a soft-spread than a hard butter. That's not necessarily a bad thing. I asked David if he had ever tried dehydrating butter... “I have seen “Butter Powder” but have no idea how they make it. I have never put any in the dehydrator to see how it comes out but I'm sure there's more to it than just applying heat. Maybe mixing it with cornstarch and drying? I know what I'm going to be doing tonight – trying to dehydrate butter! Will get back to you tomorrow on what happened.”
 
“I was thinking about the butter powder and got to thinking that maybe powdered milk would work better than cornstarch. My line of thought was that cornstarch would tend to thicken anything that was cooked with the powder.
 
I mixed it all up and added just enough water to dissolve the milk, and it's in the dehydrator now. Because the water is bound in all that fat, it may take all night to dry. I don't know, but I will keep an eye on it.
 
It tasted just a little like powdered milk but I think the overall taste will be okay. If it doesn't work out the way I want it to, I'll try it with cornstarch tomorrow.”
 
“I tried mixing some of the butter with only milk powder in it but it just clumped and wouldn't dissolve in the butter fat. It only blended in after I poured in a few cups of water. I melted 2 pounds of butter, mixed in 4 cups of milk powder, and 2 cups of water. It's starting to dry out now in the dehydrator and so far it tastes like it will have a decent flavor. If it has enough milk powder in it I think it will do okay.”
 
(Next Day) “I was pretty sure the butter would take a while because of the high fat content, but so far it looks like it just may turn out to be something workable. I'll know more after it finishes drying. I may have to redo the experiment with a little more milk powder. I think it may still be too oily to store. I'm thinking that to make a usable spread from it, we may be able to mix it with some olive or other good oil and use it that way. I'm sure it would be usable in cooking as it is right now, but I'll have to give it a try to find out for sure.”
 
(Later, same day) “I took the butter out of the dehydrator a little while ago. It is still pretty oily and I don't know how it will store. I may have to do some more experimenting with it, “BUT!”, I did try mixing some with oil and running it in the blender. The milk just clumped together like it did when I originally mixed it in to the butter. I turned the blender on and started dripping water in as it ran, and almost like an explosion, the whole batch of it turned white and thick like mayonnaise, instantly! It startled me!
 
I tasted it and I do think it would make a good spread, but it is most definitely not butter or margarine. I tried it on a piece of fresh bread, on some boiled potatoes, and on some plain pasta – it wasn't bad. I would consider it a plus if I didn't already have fresh or canned butter available.”
 
(Another 'later') “I put the bowl in the fridge for a while and it set up just like a tub of soft-spread margarine. I tried a bit more of it on a piece of bread; now I know it's a winner! It melted in my mouth just like real butter, even though it's flavor wasn't a match. It would be especially good with chives or garlic mixed in, and used as a spread on fresh,  hot bread or crackers.”
 
(Two days after that) “I used some of the 'experimental' butter tonight. Made “Chicken n dumplins” out of the leftover cured chicken and put some on biscuits. It worked well on both, but on the biscuits it didn't melt. It stayed crunchy but the taste was good.”
 
(A few days later) “I made a discovery tonight! I was going to make more of the 'powdered butter, and my mixing bowl was too small so I tried to use less water and the butter/powdered milk mixture just lumped up like a ball of bread dough when I mixed it with the beaters. It didn't feel overly oily and it didn't stick to my hands so I just pressed some of it onto the liners of the dehydrator trays and put them on to dehydrate.
 
I had a crazy idea and mixed some of the remaining 'dough' up with water and ran the mixer in it until it was all dissolved and guess what? It was milk! Whole milk, no butter or oil anywhere, and it tasted better than the whole milk made with the Nido Whole Milk Powder. 
 
That's not the only thing! I mixed a little less water with another lump and tried to whip it like whip cream and it's whipped. Not good and stiff like fresh cream but it was definitely whipped cream, no butter taste or butter fat floating anywhere."
 
 
I don't know if there is anything useful here for all of you, but I thought you might enjoy reading about our trial-and-error experiments.  Dave is always busy trying out one thing or another in his "lab-oh-rah-tory" (Kitchen), and I love hearing about it, and he's inspired to do some experimenting of my own!
 
My final take on the butter experiments is that I will continue canning butter because it works so well and is easy (there is a post about it on this blog: http://povertyprepping.blogspot.com/2012/11/canning-butter-and-cheese.html )
But I will buy commercially-prepared freeze-dried butter if I feel the need to store dry butter. 
Here are some links to sources of freeze-dried butter:
Harveston Farms http://amzn.to/1ilkWaV
Love-to-Learn http://amzn.to/1agBqCd
Honeyville http://amzn.to/1illr55
Augason Farms http://amzn.to/18XAGzU

I have a can of the Augason Farms butter powder and I just opened it in the last couple weeks and started using it.  We took some on our trip to Texas, in a ziplock bag, and I added it to all kinds of things.  I added some when I made biscuits, and in the gravy.  We also mixed some up and spread it on bread.  It was 'okay', but I think it works best "in" things.  I baked bread earlier this week and I added some butter powder to give it a buttery flavor, and there is actually a faint buttery flavor to the bread.  I still spread some fresh butter on the rest of the slice and ate it!  Mmmm, good!

Please leave comments or questions below, or email them to
povertyprepping@yahoo.com

Susan (and Dave)


.


Sunday, October 6, 2013

Making berry vinegars and wine - Guest Post

 
by Coni
 
 
To make any of the berry vinegars warm some white wine vinegar and add berries, whatever amount you want.  Then you can put it in a mason jar and keep in a cool dark place for about 3 weeks.  Shake it a little, maybe twice .  After about 3 weeks it will be a beautiful color and full of the berry flavor.  At this point put it through a strainer and bottle for storage.  It is great for salads.  Enjoy!
 
Raspberry wine is fun.  The first time we made it I entered it in the fair and to my surprise we got Best in Show.  It is so simple and fun to do  The recipe is as follows:
 
10 pounds of Raspberries
10 pounds sugar
2 1/2 Tsp acid blend
5 tsp yeast nutrient
1 1/4 tsp grape tannin
3 tsp pectic enzymes
3 gallons water
5 campden tablets
2 packages wine yeast
 
Put your raspberries,  fresh or frozen, in a food grade 5-gallon plastic bucket.  Add water, sugar,and chemicals, but NOT THE YEAST.  Stir all well, to blend the sugar.  Cover with a tight lid.  You  will need to make a hole in the lid to attach a bubbler.  Let sit over night.  Next day stir again.  Add the yeast and mix well, cover tightly with lid add bubbler, which is a plastic tube that you put a little water in and put on it's cover.  This allows the gas that forms while fermenting to escape, but nothing else can get in. 
 
Stir at least once each day for about 5 days.  This helps the fruit to break down.  Keep in mind this is not rocket science so if you miss a day...oh well, not a problem.  We want to have fun with this, not to worry it will be just fine.
 
After about 5 days you will see the fruit is now pink mush.  Take a strainer and strain off all of the fruit.  The liquid that is left you will put into a 5-gallon glass bottle called a carboy.  This is the same thing as a 5-gallon water bottle.  Attach your bubbler on the top again.  You want the gas to escape but nothing to get in.  Now just watch it bubble away. 
 
 In about 2 weeks you will notice that there are solids on the bottom of the bottle.  This is the wild yeast and fruit solids.  At this time put your carboy on a table.  You will need a 2nd bottle.  Put it on the floor and siphon the wine from the top bottle to the bottom bottle, leaving the solids in the top bottle.  This will be thrown away. 
 
Now your wine will start to get clearer.  This is called racking off your wine.   Do this process maybe 2 or 3 more times over the next 6 weeks or so.   Time is not critical.  Do this when you have time or when you remember.  Each time you rack it, taste it and see if it is to your liking.
 
At first you will taste the yeast, so don't be alarmed.  It will get better as you go.  If it is too sweet let it go for awhile.  If it is too sour, or dry as they say, add a little sugar.  Remember this is your wine and you want it the way you like it, not the way someone else tells you to like it! 
 
When the bubbling has stopped and you have racked it off so that it is clear you will add 3/3/4 tsp potasium sorbate, this will stop any further fermentation.  Wait 3 days and you are ready to bottle and enjoy.  Start to finish it takes about 3 months for fruit wine.
 
All the chemicals ,bubblers and etc can be purchased at your local brewing shop, or purchased online: http://amzn.to/17ewHtH . 
 
It sounds hard at first but once you do it you will making all kinds of flavors.  The sky is the limit.  The amount of fruit can be more if you like.  It will intensify the flavor.  Have fun and enjoy.  If I can be of any help just let me know I will be happy to do what I can.


Thank you, Coni, for this information.  It sounds delicious!  Making vinegar and/or wine is a useful task for a prepper or homesteader to know how to do.  They have many uses.
 
Please leave comments or questions below, or email them to:
 
Thank you!
Susan

Saturday, September 28, 2013

Growing wheat and other grains on the small scale


Wheat, ready for harvest.
 
 
About five years ago we decided to try our hand at growing wheat.  We had an old corral that was rich with composted horse manure.  My husband tilled it up and I scattered wheat across the ground.  I used a 5-lb. bag of organic hard white wheat, and I planted it on Mother's Day, hoping it would ripen by fall.  In our climate that's always an iffy proposition.
 
After tossing the wheat out by handfuls we walked around scuffing our feet on the ground and using a rake to cover as much of the wheat as we could.  A week later it looked like the corral had been planted in thick, lush dark green grass.  During July and August, our dry months, we watered it.  In the fall the wheat heads formed.  Antsy to follow it's progress I broke off some kernals and they were green and soft.  As time passed they turned yellow and then brown, and became hard.
 
I didn't know what to expect or when to harvest them, so I almost waited too long.  The wheat kernals had begun falling from the heads.  We decided it was time for harvest.


The first thing we thought of was to have my husband cut it with the weed-eater.

He carefully edged the weed-eater into the stalks near the ground, but they flew everywhere and were a disorganized tangle of stalks. 

He next tried a scythe and it left them a little more organized but still difficult to sort out.

 
I finally ended up just breaking the heads off the stalks one at a time and putting them in buckets.  It was slow work but I enjoyed being in the fall sunshine, and I spread it out over about a week.  I went out and broke off wheat heads for half an hour to an hour, a couple times a day.

I tried scissors and while it did work, it wasn't any faster or easier than breaking the wheat heads off by hand.  It made me think of the cotton-pickers of old, carrying a big sack and picking the cotton, one head at a time.
 Over the fall I threshed the wheat by hand.  The middle bucket in the picture has the whole wheat heads.  The one my hands are over is the one I was 'squishing' the wheat kernals into.  The bucket around the side of my legs is where I tossed the empty wheat head after all the kernals were out.
 
 
When I had a bucket full of them done I spread them on an old cookie sheet to clean them.  There was a lot of "chaff" mixed with the kernals.  The chaff is light-weight and easily blown away, leaving just the heavier wheat kernals.  This is often done outside.  One way is to spread a tarp and pour the threshed wheat onto it.  This is best done with at least two people and on a breezy day.  Hold onto both sides of the tarp and toss the wheat and chaff into the air, just enough for the breeze to blow away the chaff.  You'll probably still have to do some cleaning by hand but it blows away a great deal of the chaff.
 
Regarding threshing, I've seen several homemade threshers, including one that uses a five-gallon bucket.  There's a hole drilled in the center of the lid and a drill on the outside is attached to a chain on the inside, through that hole.  When the drill is turned on, the chain whips in a circle inside the bucket and threshes the wheat.


We have an electric grain grinder that makes a fast job of milling the wheat into flour.  This one has several setting from 'fine' to 'coarse', but even the coarsest setting is finer than our hand-cranked grinder.  Here's a quick-link to electric grain grinders in case you're interested in seeing what's available and how much they cost:  http://amzn.to/19NqZAC


Our grandson loves to pour the whole grains into the hopper on our hand-cranked grinder.  This grinder is a heavy iron one that we picked up at a second-hand store about twenty years ago.  We have a lighter steel hand-cranked grinder too, but prefer to use this one because it's more heavy-duty.
Here's a link to hand-cranked grinders for those interested in browsing:
 
  We grind not only grains for our own use, but also for the chickens and whatever other livestock we have at the time.  Right now it's just laying hens, but we've had goats, pigs, ducks, turkeys, and rabbits. 

Just for an experiment I found a large flat stone and a smaller stone and tried hand-grinding some grains.  Grains like wheat are hard-shelled and it was a lot of work to grind even a little.  I tried some dried corn and it worked very well and it was easy to grind a lot in a short time.  Unfortunately we can't grow corn in our cold, short growing season, but for those of you who can, if you ever find yourself needing to grow and grind your own grain, especially by homemade means like stones, corn is the best grain.

This is the ground wheat when I finally got it all smashed and ground around on the stone. 
 
 
The following year after we first planted wheat, it came up on it's own, reseeded by the kernals that fell to the ground before we harvested it.  The third year it was sparse.  We tilled it up and I divided the corral into three parts and planted wheat, rye, and hulled oats.  This time I used hard red wheat out of a 50-lb. bag of non-organic wheat.  There were bare patches that didn't come up, and what did come up grew poorly and never produced mature wheat heads.  I can't say it was just because it was non-organic.  Maybe the hard red wheat has different needs than hard white wheat. 
 
Later in the summer I tried to sprout some of the wheat still in the bag, and it would not sprout.  Now before I plant, I test a small handful of kernals from the batch I want to use as seed, and if it sprouts, I plant it.  If it doesn't, I get different wheat or other grain.
 
I had ordered the rye and oats from Johnny's seed company and it grew well.  The rye was much like the wheat.  We ordered hulled oats to make harvest and threshing easier.  The oats were wonderful.  They grew well and were very tasty.  We ground some into flour, but I also put some on my big cutting board and rolled them with a rolling pin to make 'oatmeal'.  I haven't tried to grind oats on a stone, by hand, but they flatten easily with a rolling pin, so they must not be as hard of a grain as wheat.  Some day I hope to have an oat roller, but in the mean while, it does work this way.  Here's an oat roller if any of you want to look at them to see what they are, or to order one:
 
I've a notion to try and make a hopper for my pasta roller and see if it could double as an oat roller.