Showing posts with label dehydrating. Show all posts

Tuesday, August 20, 2013

Fruit Leather - successful experiment

(Update below)

A reader responded to my last post about the perennial prepper garden with this comment:

"Morning!
Thank you for today's post.  Don't forget, when you have both a dehydrator and an over abundance of fruit, you can make fruit leather.
Have a great day,
David"


What an awesome idea!  It might be especially good for hard-to-dehydrate fruits like raspberries.  Don't get me wrong, it's not hard to actually dehydrate raspberries but I haven't had success with rehydrating them and using them.  They have turned into hard little balls that stayed somewhat hard and chewy when I re-hydrated/reconstituted them. 

But fruit leather might be an excellent way to dehydrate raspberries and other fruits.  I'm going to get right on that over the weekend, and expand this post to include directions and pictures for making fruit leather, for those who have never done it, or who just want to see how I do it.  I only have one fruit leather tray so I often use wax paper to line my dehydrator trays to make more at a time.

Please drop back by this post after the weekend and see what I've added. 

UPDATE:  The raspberry fruit leather is delicious.  It took three days for it to dry in my oven with just the pilot light for heat, but it came out great.  It's tasty and it's a beautiful red color.

I decided to make a small batch for the trial, so I used 2 cups of raspberries, half a cup of sugar, and a quarter cup of water.  I heated them in a pan and simmered them until they thickened a little.

Then I lined a cake pan with parchment paper and poured the raspberry goo into the pan

I put it on the bottom shelf of our oven.  Our oven uses propane and has a pilot light, which
keeps the oven around 95 degrees.  I put the pan on the bottom shelf so that it was closer
to the heat from the pilot light.

It took three days before the top wasn't sticky any more, so I carefully peeled it up from
the parchment paper.  The underside was still sticky but there was no
sign of mold, which was a concern since the raspberry goo was at
a low-ish temperature for so many days.

I put it on a dryer screen with the sticky side up to finish drying it.
 
I'm sure this would have dried faster in an electric dehydrator.  If you don't have fruit leather trays for your dehydrator racks you can use parchment paper or wax paper to line your racks/trays.
 
The taste of the raspberry fruit leather is mouth-wateringly flavorful!
 
Please leave comments and questions below, or email them to me at:
 
Susan


Wednesday, June 5, 2013

Dehydrating your own "Instant" food


A lot of people are familiar with "Minute Rice", which only takes 'a minute' to cook.  Minute rice is just pre-cooked rice that has been dehydrated.  They may use a freeze-dry process or they may just dehydrate it.  But it's easily made at home.
 
Have you ever left a plate on the counter with a few bits of rice on it, and the next morning it was hard and dry?  You've just made Minute rice by way of not doing your dishes before you went to bed!  Or those dried grains of rice on the inside of a pan...more Minute rice.
 
That's not the way I recommend you make it though.  I cook a pan of rice until it's nearly done, making sure it's not too chewy and hard, but not cooked into a clumped mass of almost-pudding.
 
Then I drain it if necessary and spread it on screens or dryer racks.  After a few hours of drying I use my fingers to stir up any clumps, and I might do that again a time or two, just to separate all the grains of rice.  I don't worry too much about small clumps when the rice is freshly cooked.  It's easy to break them up as they dry.  Any clump bigger than a large pea, I try to break up and spread out.  But even bigger clumps can be broke up a couple hours into the drying process.
 
Rice dries quickly.  Depending on how you're drying it, it can be as fast as a few hours or as long as overnight.  An electric dehydrator is the fastest.  I've dried rice on cookie sheets in the oven with the pilot light for heat, and on shelves above our woodstove.  If you live in an area with very low humidity it would dry just fine sitting on the kitchen counter.
 
Store the instant rice in an air-tight container, preferably glass or metal.  The cooler and darker you store it, the longer it will taste fresh when you use it.  It will always be safe to eat, but the flavor will eventually fade or flatten.
 
To cook the rice, use equal parts of water and rice.  I've put the rice right in the water at the start, and I've also waited until the water boiled before adding the rice, and I haven't noticed any difference.


I dried pinto beans so that I would have "instant" beans that I could use on short notice.  I usually Can dry beans for 'Instant" beans but I wanted something that didn't use up my canning jars.  In the winter when our woodstove is going to be hot anyway, I cook up pots of beans with the 'free' heat.  Some are still canned, but in the last few years I've started drying a lot of them.
 
Cook the beans until they are completely cooked and soft, but not falling apart into mush.  Then spread them on screens or racks to dry, just like the rice.  They dry a little slower than the rice but a lot faster than I expected.  Store in an airtight container.
 
To use the beans, soak in water for 15-minutes to half an hour.  Then use as you would freshly cooked beans.  At this point I often mash them and make refried beans, adding a bit of onion and garlic.  I also make bean soup by adding onion and chopped, cooked bacon.  Use them in whatever favorite recipes you have for beans.
 
This works with all dry beans, as well as with lentils and split peas.  It's a good way to have an assortment of ready-to-use beans, lentils, and split peas on hand, ready to use.


I tried an experiment with boxed macaroni and cheese.  I know it doesn't take long to make boxed macaroni and cheese, but I wanted something we could heat quickly while camping, and not use up much stove fuel. 
 
The first batch I did, I cooked the macaroni until it was done, drained it, and spread it to dry.  When I went to use the "instant macaroni and cheese", the macaroni turned to mush in the pan and stuck together in a huge clump. 
 
The second time, I cooked the noodles until they were somewhat soft but still chewable.   I drained and dried them, and then when I added them to boiling water, they finished cooking in about a minute.  I mixed the milk, butter, and cheese packet into the noodles, and the finished meal was undistinguishable from freshly-made macaroni and cheese.
 
I store the cheese powder packet in the jar with the noodles so they're handy to prepare.
 
Did I save anything by doing this?  Not really.  It still took fuel to cook the noodles, whether I pre-cooked and dried them, or just prepared them at the time the were to be eaten.  The only advantage I can see is for using it as camp food, or in a bug-out bag.  In a bug-out situation, if you even have a small stove of some sort, you'll definitely want to conserve fuel.  And if you have children and have to bug-out, it's a nice comfort food for them.  Be sure to include powdered milk and possibly powdered butter, and maybe some salt.  I haven't put this in my bug-out bag yet, but if I do, I'll mix the powdered milk, powdered butter, and salt in a small ziplock bag and put a rubber band around it and the jar, or use masking tape to attach it.
 
It could also be used during a time of power outage or any other interruption to your source of energy for cooking.  If you don't have a back-up way to heat food, it's a good time to do research on it.  There are old posts near the beginning of this blog with some good ideas.
 
 
Please leave comments and questions below, or by email at povertyprepping@yahoo.com
 
 
Thank you!
Susan and the Poverty Prepping team.

Wednesday, January 16, 2013

Food Storage: Preserving Meat, Dairy, and Eggs (My new book!)

My new book is out!  Dave, of Dave's Kitchen, co-authored it wth me.

 It's called "Food Storage:  Preserving Meat, Dairy, and Eggs"

The kindle version is available now from Amazon and the print book will be out next week. Click on the picture to go look at it:


Product Details

Here's the 'blurb' about the book:  "There are a lot of books about food preserving but what sets this book apart is that each food and all the methods for preserving that particular food are described in their own chapters. The active Table of Contents allows you to click on a subject and go right to it. The book includes parts I and II:

Part I is an explanation of all the preserving methods, how to do them, and what you’ll need: Canning, Dehydrating, Freezing, Salting, Brining, Sugaring, Smoking, Pickling, and Fermenting, as well as some not-as-often heard of ones as Ash, Oil, and Honey for preservation.

Part II starts with meat and works it’s way through beef/venison/elk, pork/bear, goat/sheep, rabbit, chicken, turkey, duck/goose, and fish; then dairy: milk, butter, cheeses, yogurt and sour cream, and finishes with a chapter on preserving eggs. All the methods that work well with each food are explained along with directions for the preparation and processing of that food. There is also information about what doesn’t work and why."

This is a good book for preppers to keep on hand.  If the SHTF, you'll have directions for preserving food without modern equipment, although the modern stuff is in the book too.

The "Look Inside" sneak-peek looks terrible on the Amazon website, but it looks okay on a kindle. 

Friday, December 14, 2012

Getting to know me

If you're interested in reading more about me and my family, and our lives here on our remote off-grid homestead in NW Montana, my husband keeps a blog, which includes a lot of pictures:

http://www.livinglifeoffgrid.blogspot.com

There's about three years' of what it's like to live with solar electric power in the north, garden in this challenging climate, preserving our food, foraging, hunting, fishing, trapping, washing laundry in washtubs with a hand-cranked wringer, using rainwater and snowmelt for household use, living on what's basically a 3-mile, steep, one-lane, goat trail 4-wheel drive road, having grizzly bears, wolves, and mountain lions roam through our yard (pics from game camera!), and much, much more.

I'm not selling anything.  Just sharing it with those who are interested.

Wednesday, December 12, 2012

Dave's Kitchen - Dried Cranberries

 
Dried Cranberries

To dehydrate cranberries they have to be cut or they will just cook and swell up before they dry. I had sliced each berry in half with a knife to fill the first 5 gallon bucket but I got smart and chopped them in a food processor for the second. The picture attached was with the berries ran through the food processor. It really sped up the process.
 
They can be used pretty much the same way as you would use fresh, just soak them in water first. To make cranberry sauce, just put them in a pot of boiling water with sugar and they will cook up great. They have a high pectin content and will form a thick sauce when they cool, just like a fruit jelly. They also make a good tea, just pour boiling water on some in a cup and let it sit for a while and drink hot or add ice and drink it cold - add some sugar if you like.
 
I add them to sweet potatoes when baking them with brown sugar(candied sweet potatoes), add them to the dish dry and they will soak up liquid as they cook. They also go good in pumpkin or sweet potato bread, add them dry and they cook up fine. If you add fresh berries to the batter they will be soft and mushy in the loaf but added dry they do well.
 
My daughter brought in 4 more bags of fresh cranberries yesterday that I haven't done anything with yet. I'm going to slice them and soak them in sugar before I dry them and see what they come out like. That may make a good snack item(if we're lucky), nothing like experimenting to learn something new, huh?

Friday, November 23, 2012

Food Storage Cheeseburgers


This cheeseburger was made entirely out of our food storage.
 
I started canning hamburger patties about five years ago.  My first efforts weren't so good because I still canned meat by covering it with water and leaving headspace.  It left the burgers soggy and tastless.  Then I heard about dry-canning and I've been doing that ever since.

Canned Hamburger Patties
 
I brown the burger patties on both sides, then set them on a platter to cool a bit.  When I form the patties I use a lid from a wide-mouth jar as a sizer so the burgers will be just slightly smaller than the jar after I brown them, but not too big to drop in the jar.  I use wide-mouth jars because it's easy to shake the burger patties out, or to fish them out with a fork if necessary.

Canned cheddar cheese
 
I learned about canning cheese about a year later.  The instructions for that are just a couple posts away from this one on this blog.  When I'm ready to make a cheeseburger I slide the cheese out of the jar and slice off what I'll need.

 
Using my stored flour, sugar, salt, yeast, and oil (or shortening), I make dinner rolls. Some of my tips for storing these items will be at the end of this post.  Right now I want to stick with the cheeseburgers for those who don't need information on how to store these ingredients.
 
 
When the dinner rolls are ready I take however many I need for the meal, and slice them in half, then set them aside.  I open a jar of hamburger patties and pull out the number of patties I need.  The burgers are heated in a pan on the stove.  The burgers in the top of the jar will be drier than those farther down.  If the ones you are using feel a bit too dry, add a little bit of water to the pan. 
 
The burgers are already cooked, so they only need to be heated.  If you have a microwave oven you can heat them in there and skip using the stove.  Just place the burger patties on a paper plate or other microwave-safe dish and heat them in the microwave.  You'll have to experiment with time since all microwaves are different, but I wouldn't give it more than a minute at a time.  30 seconds might be better until you know how much time your own microwave will take.
 
Take the jar of cheese and dip the outside in hot water for a couple of minutes.  Run a knife around the inside of the jar between the cheese and the glass, then using the knife, gently pull the cheese out of the jar.  You don't have to pull it all the way out if you don't want.  You can edge out enough for a cheese slice and cut it off with a knife or cheese slicer, then edge it out a little more and cut another slice.  Or you can pull the whole thing out and slice it.  Simply push the leftover cheese block back into the jar and put the lid back on.
 
 Slicing canned cheese
 
Once the jar of burgers or cheese is open, the leftovers should be stored in the fridge
 
For condiments, I have dried onions from my own garden.  I soften them in water while waiting for the meat to heat.  When they're rehydrated I drain the water and let them air-dry for a few minutes while I slice the cheese.
 
I keep ketchup in my food storage, but if I didn't, I'd take some of the dried tomato slices from this year's garden and put them in the blender to make a powder.  This is assuming there is electricity available to do this, by the way.  If not, you might want to just rehydrate the tomato slices in water and put them on the burger.  But if you can make the tomato powder, then you can add some sugar and vinegar, and water if it's still dry.  Stir it and you have a reasonable imitation of ketchup.
 
I store bottled mustard and the spice jars of dry mustard.  If you only have the dry mustard, add little bit of vinegar or water, or both, and spread it on the bun.

If you don't have pickles stored, adding vinegar to the tomato powder or mustard powder can fool you a little bit, into thinking there's a pickle in there somewhere.
 
Mayo, if you use it on burgers, can be stored in jars, either store-bought or homemade, or you can make it on the spot if you have eggs and the other ingredients. 
 
It's possible to dehydrate lettuce, and I've done it, but mine crumbled when I tried to rehydrate it.  The chickens enjoyed it.
 
If all you have is butter or margarine it'll at least add moisture and flavor to the sandwich.
 
One of our favorite variations to the standard cheeseburger is to lay the bun open face on a plate and place a heated burger on each half.  Pour chili over it, sprinkle with rehydrated onions, and shredded cheese from the block of canned cheese.
 
We have enough solar power now to run a small refrigerator in the summer, but until a few years ago we only had meat or cheese if it was canned.  The exception was in the winter, which is consistently cold enough here that we can keep food in a cooler on the north side of our cabin.  We still disconnect the refrigerator in the fall because of the very short hours of daylight this far north in winter.  The canned meat and cheese has provided us with many good and varied meals. 
 
Canned meat and cheese are great to keep on hand in case you're stranded at home during a bad storm and want something interesting to eat.  Or you can take the meat and cheese with you on a camping trip, and either make or buy buns before you leave, and have a treat in the wilderness.  If you're preparing for long-term disasters it'll give you a nice break from basic storage food like rice, beans, flour, etc.
 
One of my upcoming posts will include pictures and instructions for canning meat.
 
 I store flour and sugar in 2-gallon plastic buckets from a local bakery.  I don't do anything special to it; I just pour the contents of 25-lb. bags into the buckets, then label them with a marker.  Before I discovered this source for buckets I put the bags in a large plastic tote. I taped over the vent holes in the handles with masking tape or duct tape, to keep out bugs.  If it was going to be stored more than a month or two, I also ran tape around where the lid and container came together.  I've also at times put the bag of sugar or flour in a large plastic trash bag if I had to store them under a bed or somewhere similar, but I'm not comfortable with what chemicals may be in or on the trash bags.  Some are treated with pesticides.
 
I set cans of salt inside a 2-gallon bucket and snap the lid on.  That keeps the salt dry, since the cardboard cans it comes in are susceptible to moisture.  I can fit 3 cans on the bottom layer and 4 cans on the top layer.
 
If you have a Food Saver or other vacuum-sealer you can seal the salt in bags, and then place it in the bucket or other storage container. 
 
If I've missed anything, please let me know.  My two-year old grandson has been playing on my lap during most of the writing of this post, so who knows what I might have missed!  :)
 
Susan

Thursday, November 15, 2012

Dave's Kitchen: Making hominy

Dave's been busy in his kitchen lately, while most of us slowed down as gardening season winds to a close and the harvest is preserved and stored.  Here's what he wrote to me today:


I use "Feed Corn" purchased from a local feed store to make Hominy
and to grind as "Corn Meal".  Many will say that this is not a "Healthy"
practice but I dont accept that argument as a general rule. That debate
can be pursued in other places.

I dont use "Deer Corn"; it is usually full of garbage, bits of cob and less
than perfect kernels. Also it doesn't usually have any limits of "Aflatoxin"
content like much of the feed corn, and all the corn marketed for human
consumption does.


How To Make Hominy

Pick and clean 2 quarts of corn.  The kernels can be poured on a table
top and picked through as one would do for dry beans. Reject any
kernels that are broken, damaged or otherwise not perfect. Cracked
kernels will break down in the soaking process and "Gum Up" the
works, making the finished hominy harder to rinse clean.

Place the cleaned/washed corn in a 4-gallon granitware pan and fill it
to about 4 inches of the top. Add 1 rounded tablespoon of Lime(Pickling
Lime from the Grocery store will work) per pint of corn and gently mix
it into the water. Be careful not to let the dust get airborne, it can be
hazardous to breathe. It may seem like a lot of water for the amount
of corn but at the end of the the "Liming", you will see why.

Place the pot on the stove and bring to a boil, then reduce the heat to just
under a boil. Cover and let it sit for about 4-6 hours, stirring occasionally.

When the kernels have doubled or even tripled in size, pinch one between
your fingers and if there is no "Dry" material inside, it is ready to rinse.

Drain the lime water and rinse the corn in clean water and return it to
the pot.

Fill the pot with warm water and, using your hands, gently rub the
kernels together to remove any dissolved shell that may still be on
them, and rinse. Repeat until the water is clean and clear.

At this point the "Hominy" is finished and can be eaten. I usually
dehydrate and grind it into meal and use it to make cornbread, but it
can eaten fresh, cooked with peppers and onions and eaten like corn,
or made into tortillas. It's also good cooked into soups or chopped fine
in a food processor and added to Chili.


To dehydrate/dry the Hominy, it can be spread on a flat surface in a
warm, dry and clean location that is free of insects and other pests.
To dry in a dehydrator, spread the kernels on your tray in a thin
layer and dry at medium heat. If the dehydrator heat is set too
high, it may "Glaze" the outsides of the kernels and seal in the
moisture.

This batch of Hominy is destined to be ground into "Meal" so I
left much of the "Germ" in during the rinsing.  It adds flavor, fat
and other nutrients. If you are going to use the hominy as a table
dish, you may want to rinse the germ out for a better appearance.

 Two quarts of whole kernel corn straight from the feed
bag, along with the "cast offs" seperated from it. This bag of
corn had more broken kernels than most I buy but it was still
a good clean bag of grain.
The limed and rinsed kernels, ready
to eat or dehydrate.
 Kernels spread on the dehydrator tray, the layer is
thin enough to allow air flow around the hominy to speed the
drying process.

The finished dried hominy, ready to store or grind
into meal for use as "Grits", in cornbread or other recipes.


Thanks, Dave, for sharing this with us.  It sounds like something that would be good in Taco soup, among other things!  I'm looking forward to trying to make my own hominy.  We've always bought it in cans from the store. I love learning how to make things myself.   I appreciate all that I've learned from people as I've worked on this blog.
 
Please keep sending your emails with comments, suggestions, and questions!
 
Susan


Thursday, October 18, 2012

Dave's Kitchen

 
Far, far away, in the land of Texas, I have a good friend named Dave.  Dave lives in his garden, using his house as a place to cook, can, and dehydrate food, and, on rare occasions, sleep.  In his climate he can grow things most of the year.  While I envy that, it's not what I most admire about Dave.
 
What I admire most about Dave is the canning and dehydrating he does.  I've never even heard of some of the things this guy has stuffed in a jar and run through his canner.  Things like pickled watermelon rinds and candied sweet potatoes.  Or dehydrating sweet pickles, eggs, yogurt (yes, yogurt!), sweet breads (pumpkin, banana, etc.), chili, and leftover spaghetti.  He also salts and smokes food to preserve it.
 
As a regular feature of this blog we're going to start checking in with Dave and see what he's up to.  We visited him a couple of weeks ago, and he's the real deal.  And if he's not enough of the real deal, you ought to meet his daughters!!!  What an amazing family.  I hope you enjoy and learn from the things I'll be posting from and about them.
 
 This is just one of the herb beds Dave planted.  This is Basil.  He grows and dries bushels of it every year! 

This is some of Dave's dried basil, vacuum-sealed in Food Saver bags.


The bag in back is dried Okra, and in front is dried sweet pickles.
Dried sweet pickles?
 
In a message earlier this year Dave wrote:
 
"Most of what I dehydrate is just regular raw fruit, vegetables, eggs, cooked beans and rice, and left overs,and cooked pasta.

Yesterday I made a chicken and broccoli dish to serve over rice and there was alot left over(intentionally) so I mixed it with the rice and put it into the dehydrator and just took it out, bone dry, only a fraction of the space and it rehydrated great.

My dehydrator was some of the best money I have ever spent(would be lost without it), next to my tiller that is.

While I was waiting for the chicken and rice to finish up, I canned 30 pounds of chicken leg quarters. I used to can it bone-in but I saw that most people cooked it first. I tried it that way, and now I bake it first, then de-bone it and can it."


Candied sweet potatoes (left) and  Mustang Grape Juice
 
Many of Dave's emails are sent at 1-something or 3-something o'clock in the morning while he's waiting for a canner load of something to finish up.  Or he's about to put something in the dehydrator.  I often wonder what he runs on, because he keeps on running.  Usually he's been out in the garden all day, then prepping, processing, and preserving food most of the night.
 
So, pull up a chair and grab a bite of candied watermelon rind (it really is good!) and we'll learn together.  Look for a new post from Dave's kitchen about twice a month.
 
Meanwhile, thanks for all the emails of support after the death of my sister-in-law, and thanks for the prayers and good wishes.  Sadly, after the funeral my 81-year old Father-in-law had a stroke and he's still in the hospital.  He's in rehab/physical therapy right now while they determine what he still has, what he lost, and what they think he can get back.  We're still in Kansas helping out.
 
Take care, everyone.
Susan


Saturday, August 18, 2012

HomeGrown Tea

Hi Everyone!  I've been buried under raspberries and peas.  We've been picking around 2 gallons of raspberries a day, and a lot of peas.  I've also been harvesting herbs and drying them.  Some are for various medicinal complaints that might arise, but our favorites are for tea.

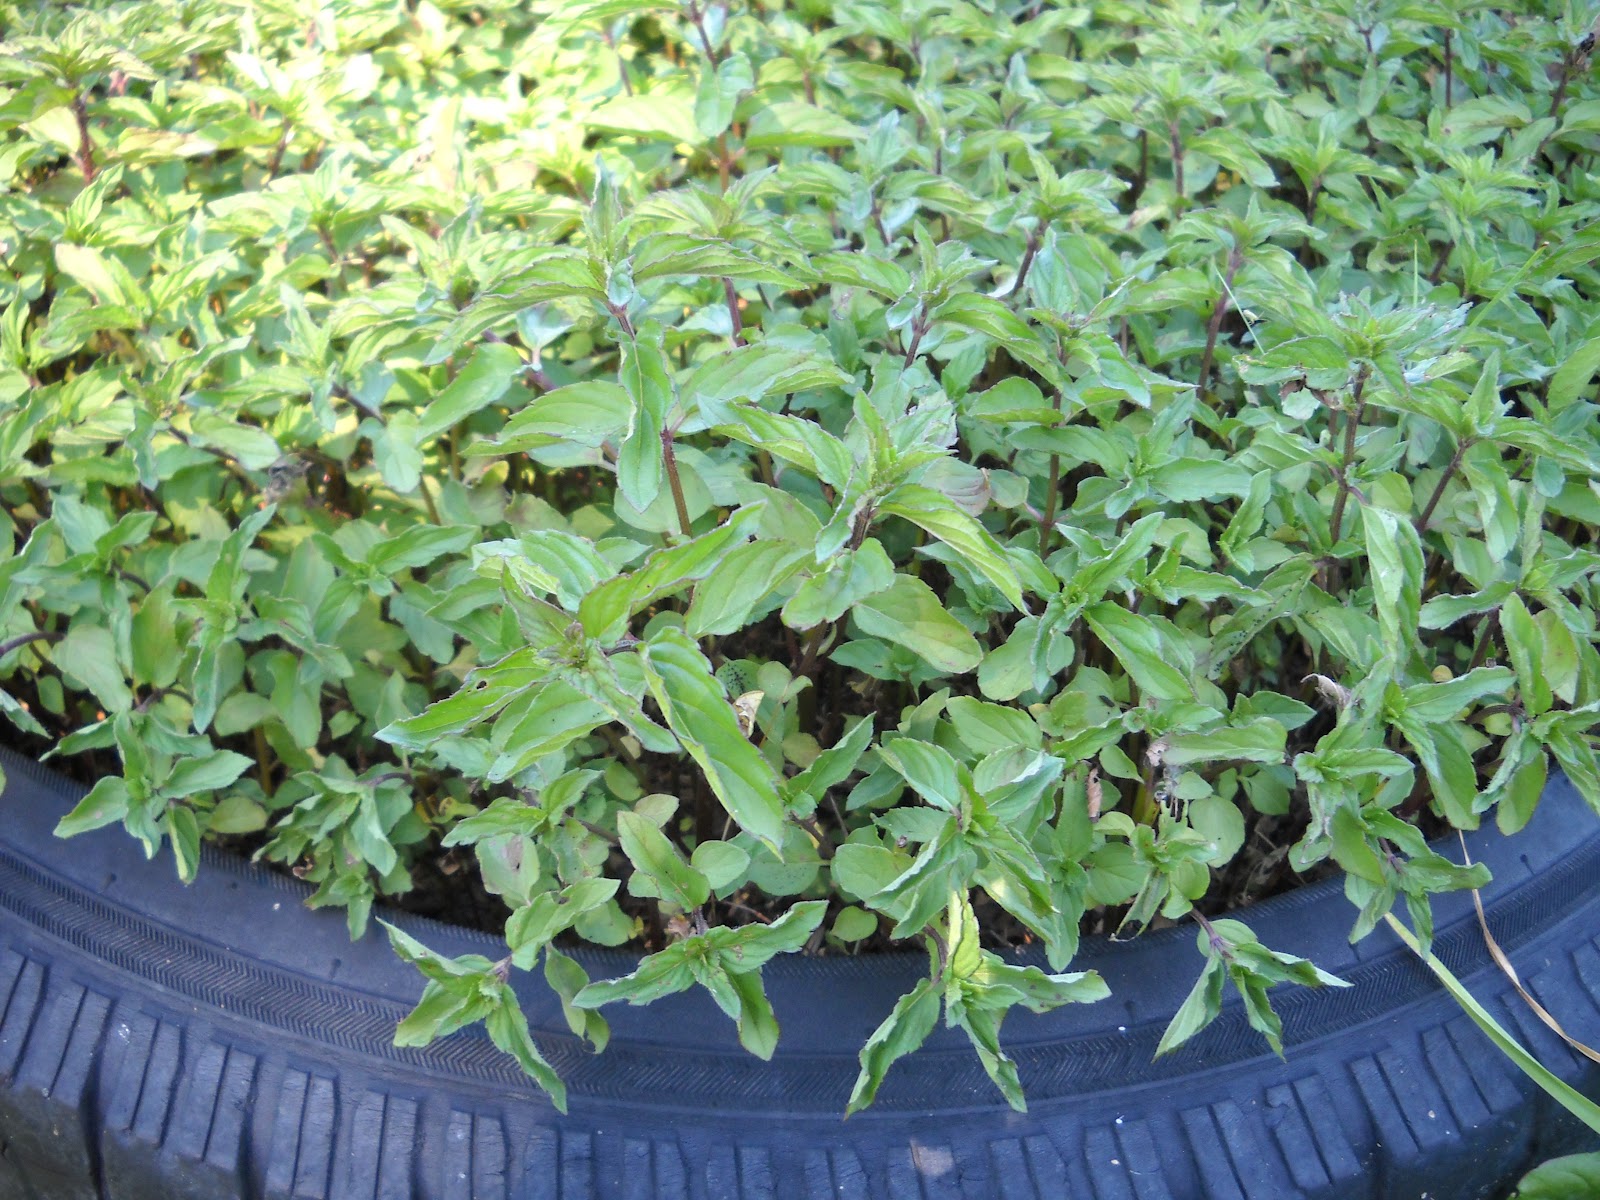
Mint is our favorite homegrown tea.  It makes great iced tea as well as hot tea, but on a summer day nothing is more refreshing than mint iced tea.  Just straight mint leaves, fresh or dried, steeped in hot water, then add cold water.  You can add sugar or honey or your favorite sweetener if you prefer it sweetened.  I grow it in tires since it spreads out and takes over.  The mint in this picture was cut a couple weeks ago and is growing again.  In our climate I can cut it three times a year if we get enough rain or I keep it watered.

Since sugar has gotten so expensive we've started drinking it plain.  It took some getting used to, and sometimes I still add sugar.

Another tea herb we grow is lemon balm.  Besides using it for a pleasant, relaxing tea I planted it because if this old world ever does have some sort of catastrophe, we'll have something we can grow here in the north that smells like lemons.  It's something I would miss.

Some wild plants you can use for tea, and that grow in most parts of the United States, are clover (especially Red Clover), Roses (the rose hips are the part used for tea), and Pineapple weed.  Pineapple weed is a member of the Chamomile family.  They grow in hard-packed ground, such as the gravely areas along roads and sidewalks, sometimes out of the cracks in sidewalks.  They have a strong Chamomile smell and the flowers look like chamomile flowers with all the petals pulled off.  Pineapple weed never gets the petals.  They just look like little pineapples sitting atom the stems.  The stems are anywhere from a few inches tall to a couple feet tall, or for our foreign readers, they're about ankle-high to knee-high.  Pictured here is Pineapple weed.

When I harvest plants, either wild or domestic, and intend to use them for tea I pick or cut them, then spread them on screens to dry. If you cut something such as mint that has grown tall, you can tie them in bundles and hang them in your house to dry.  We live in a dry climate so it only takes a few days for spread-out herbs to dry.  In humid climates it will probably take longer.  I don't have experience with drying plants in a damp climate, so if someone would like to share stories about that, I would appreciate it. 

Mint, left, drying on screen.

Once the herbs are dry I store them in air-tight glass jars.  You can store them in plastic bags or bottles but over time they can pick up odors or they can oxidize since plastic is somewhat porous, although it seems air-tight.  If I know I'm going to use them before the next season's harvest I go ahead and use plastic if I need to.  I prefer glass jars.

I save every glass jar we get, which on our budget, isn't very many.  But we do occasionally buy a jar of Salsa or something else that comes in a glass jar, so I wash them out and keep them.  Peanut butter and Mayonaisse used to come in glass jars but now they're hard to find in anything but plastic... at least around here.

These are Rose Hips (right).  After roses are done blooming they form a small fruit that looks like a little apple.  These are the 'hips', and I don't know why they are called hips!  All roses and the hips are edible, but be sure the plant(s) you harvest from haven't been sprayed with things like pesticides or herbicides.  It might also be safer to avoid those that grow along busy highways.  I haven't heard if fumes from vehicle traffic presents a health hazard if you eat these plants and their fruits, but unless you're truly starving and can't find plants away from highways, pass them up just in case.  Perhaps one of you readers have information on this.

To make tea with the hips you can crush and steep them.  Some people remove the little hairy seeds inside them first.  Just as a matter of interest, you can make jelly with the hips, too, if you're a jelly-maker.

Pictures on the left is white clover.

 Here's an interesting tidbit about white clover. I don't know if it applies to other kinds of clover, but you can dry the white clover heads and grind them into flour. It can be added to regular wheat flour for variety in nutrients, or to extend the flour to provide more meals. This is useful information if times become very desperate. This was done during the famine in Ireland, among other times and places.


This is purple clover, and there is also Red clover, but I couldn't find any around my yard toay.  Clovers are edible and medicinal, but we'll cover medicinal in another post.  When you pluck a clover flower you can suck the bottom of the flower and there will be a small drop of honey-like sweet fluid.  It would be interesting to know if a person could make their own syrup-like sweetener by any process or extraction, at least one a person could do for free in their home.  Meanwhile, you can make a delicious slightly-sweet tea that you can drink hot or cold.


Other refreshing teas can be made from such plants as Raspberry (picture), Strawberry, and Blackberry leaves.  They won't have the faint berry-ish taste of commercial teas in those flavors, but you can mix them with other tea plants such as rose hips for more variety.  The bottom line is finding delicious, healthy foods that are free.  Many areas have wild berry plants, especially in wooded areas or along creeks and rivers.  The berries are delicious too!  If they're in season while you're harvesting leaves for tea, pick some berries and add them to your tea.  Crush them in your hands and either just squeeze the juice into your tea, or smush them up good and toss them in!                                                                                                                                   


Plants with leaves, such as mint, can be stored whole, or you can strip the dry leaves from the plants to save space in the jars or bags.  The sticks and stems won't hurt if you choose to leave them in, but the leaves are mainly what you are after.  In this picture I have been stripping the leaves, packing them into the jar, and making a pile of the sticks in the lower-right corner of the picture.

I admit to still being in the learning process myself, so I have shared with you what I know, while admitting what I don't know.  Comments, suggestions, and any information you wish to share are helpful.  We can all learn together.

As with all plants, both wild and domestic, make SURE you are certain the plant is what you think it is.  If you have any doubt, find someone reputable that knows the plant and ask.  In most places you can pick a sample of the plant and take it to the county extension office and they'll tell you what it is.  Please be careful as you learn.

Comments:

"I live in N Central Texas, which has become quite humid over some years, and how I dry my tea (and other) herbs is in brown paper bags. The herb must be completely dry and the bag as well, with nothing else in it. If I am hanging the herb(s) in bunches (like Yarrow), I put them in the bag, top down, and tie a tie around the top of the bag and hang it in the driest place I have. Otherwise, I put the herb in the bag, roll the bag down at the top, clip it and set in a dry place. This has worked very well for me.

And thank you for your lovely blog. :)

MtWoman"

Received via email Tues. August 21, 2012.  Thank you, MtWoman!  I'm guessing the paper bag wicks moisture away from the plants as they dry?  It's wonderful to get this tip from someone who lives in a humid climate.