Wednesday, September 19, 2012

Disaster Preparedness Guest Column

I like to read fiction as part of my Preparedness education.  It might seem an odd way to learn, since fiction is made-up stuff, right?  Maybe, maybe not.  A book about a fictional disaster usually portrays the characters doing 'real' things for their survival.  You can learn a lot of good survival tecnhiques and tips while being entertained by the story.
 
One of my favorite disaster, survival, or prepper books is actually 3 books.  It's a series called "World of the Chernyi".  In my opinion it's one of the best sets of books there are, about survivors of the world as we knew it.  Despite the sound of the word "Chernyi" sounding a bit like it's from a magical, fantastical, imaginary land, these books take place in 'nowdays' America.  "Chernyi" is Russian and sort of means black or dark, so putting that with "World" is an accurate depiction of the times after the end of the world as we know it, or "TEOTWAWKI", as some preppers say.
 
The books are very well written and the characters are great.  In case you're interested in checking it out, here's a link to them on Amazon:
 
But I'm not writing this to promote the books.  One of the emails I got last week was from Mr. D.K. Richardson, the author of these books.  He likes what we're doing over here on this blog and he's offered to write a guest column, chapter by chapter, of his Disaster Preparedness book!  We are very fortunate to have him share the vast amount of survival information that he has, and I think him very much.
 
He would like this to be interactive and welcomes your input and questions, so please be involved with this.  It's your chance to find out what you need to know, and to ask an expert directly.
 
Without further ado, here's the Introduction:


Want to be prepared for a disaster?
        The daily news shows or tells of stories filled with disaster - floods, wildfires, massive snowstorms and even worse, disasters made by man - train derailments, factory fires, riots and the like.
        These stories can be frightening, what if you lose power for days or weeks? What if you have to flee your home? What will you do? Where will you go?
        As a Certified Disaster Recovery Planner, I've spent years advising major corporations and written more than a few Response, Recovery and Restoration Plan set. In those same years, I've found this aspect of life is something that most of us have either overlooked, or frankly, ignored. Being prepared need not be expensive or complicated. Susan has graciously allowed me space on her blog to post the following set of documents - something I hope you not only find useful, but take advantage of to do your own preparation for future disasters.
        This will be a series of 12 guest posts, each covering a specific area. All of this information and more, with photos and "How To" sidebars is in the upcoming book "Homemade disaster kits: A Do It Yourself Guide for low cost preparation for future disasters."

        Here are the book chapters in the order they will be posted. These blog posts are the Clif Notes, the book contains more detail and additional images.

1 Water
2. Shelter and protection from environmental elements
3. Fire and light
4. Nutrition (food & cooking)

5. First aid and medical
6. Hygiene and clothing
7. Communication and signaling
8. Tools and repairs
9. Safety and defense
10. Travel and navigation
11. Morale and mental health

12. Important documents (passports, insurance, license, etc)

Finally, a way to carry this that is both inexpensive and low key.

 
        These steps are relevant whether you are forced to leave your home or are able to stay in the home to shelter in place.

Water

        You need at least two liters per person per day, minimum, just to survive. If you are traveling or working, make that a gallon per person, per day. This Chapter covers storage, gathering, purification and suggestions for transport. I discuss the difference between water filters and purifiers, and why that matters. More than one type of home made filter will be described.

Shelter and protection.

        An inexpensive tarp and some cordage will go a long way to keep you out of the weather. I show you how to make the most of simple materials to provide shelter from the elements.


Fire and light

        If outdoors, you will need a source of heat to avoid hypothermia, cook food and provide light to perform any work after dark. I discuss a variety of inexpensive stoves, and show you how to make a pair of stoves that burn a common commercial product. I walk you through the choices in flashlights, lanterns, and candle lanterns - showing you how to make a couple of small candle stoves and lanterns. The last part in this chapter will discus the advantage and disadvantages of a campfire and how you might use a so-called Dakota fire pit, a rocket stove and other efficient ways of cooking with wood.


Nutrition (food & cooking)

        This Chapter focuses on putting together your own meal, ready to eat. Using commonly available long shelf life commercial products, you can make your own tasty and easy to cook or heat to eat meals. I discuss several common problems with home-made MREs and show you how to avoid the problems. Finally, since you should store what you eat - and eat what you store, I show you how to incorporate your homemade MREs into your day to day diet so that rotation and out of date foods should never be a problem.


First aid and medical

        As a former licensed EMT and having worked while in the military as a military medic, the focus here is on training. I outline a basic First Aid Kit (FAK) and why this is important. I describe an advanced FAK, one that is layered - so that the supplies you do buy are appropriate and inexpensive. The types of injury you can treat with the FAK is discussed as is the issues of Over the Counter medicines. While you can make a very nice FAK for less than a commercial offering, training is one area where you are advised to obtain commercial training. I list sources for hands on training and give you sources on the 'Web for follow on and self-training.

Hygiene and clothing

        More men were lost in the Civil War to poor sanitation than were ever killed in battle; this is true for the Boer war as well. I cover basic field sanitation, describe ways to wash your clothes in a disaster situation and list several ways to bath while in less than ideal conditions. Being clean isn't about smelling bad, it is a health issue.


Communication and signaling

        Communication is more than a cell phone. In this Chapter, I cover communications planning, alternate means of communication and the 'how it works' of commonly available communication equipment. Specifically, MURS, GRMS, CB, FRS and Ham radio are discussed at length. I even discuss crystal radios for fun and battery free listening.

Tools and repairs
        In this Chapter, I discuss the common, lightweight tools you should have on hand for use in a disaster. The classic saw of "A stitch in time saves nine" is more correct than not. I describe a small but comprehensive sewing kit and a larger tool for use in repairing large tarps, backpacks and the like.


Safety and defense

        This Chapter is a brief discussion of safety issues faced by those displaced by a disaster. I list ways to protect yourself and family members, your valuables and offer suggestions on ways to avoid problems before they impact you. A brief discussion covers the pros and cons of carrying a firearm - since laws in the US vary so wildly, I cannot offer specifics for your area.


Travel and navigation
        If you can't tell the players without a program, you'll find travel far more difficult without a map. I discuss common map products, then provide a listing of where and how to obtain free or low cost map products for your use. I cover compasses, and point you to free, on-line training sources for the use of your compass. While a GPS receiver is nice, it does have some real-world drawbacks - I discuss those drawbacks.


Morale and mental health

        If you have children, you already know dealing with a bored child is almost as bad a dealing with a bored adult. I discuss some low cost and light weight items to carry that can make a difference in the inevitable down time faced when away from home and familiar surroundings.


Important documents (passports, insurance, license, etc)

        It's a fact of life that we all have a paper trail following us through our life. If your home is damaged, or destroyed, having the right papers can make a major difference in how rapidly your life can be restored. I discuss the documents you should have with you, and what other measures you can take to safeguard important documents such as birth certificates, DD-214s from military service, marriage certificates, insurance papers and so on.
        The capstone project for the book is to build a take away 'bag' with the essentials for four days for one person using all of the information covered in the book. In this case, the bag will be a Yukon ruck, made from your tarp and holding the items you need should you leave your home. The capstone project assumes you have transport.

Being prepared doesn't mean you have to break the bank.
 
Thank you, Mr. Richardson, for sharing this wonderful information with us.  We look forward to the rest of your guest posts!
 
Readers, please leave comments, or send those or questions and suggestions to:


Wednesday, September 12, 2012

Bug-out bags

"Any such thing as an uncomplicated bugoutbag? Thanks in advance. A real novice at this.
SLW"
 
There are about as many ways to put together a bug-out bag as there are people and potential situations.  It doesn't have to be complicated though.
 
Start with thinking about what sort of things would cause you to need to bug-out.  Do you live in an area prone to flooding?  Hurricanes?  Wildfires?  What about winter snow and ice storms... if the power went out would you stay home or go somewhere else?
 
If you had to leave home for one of those situations, would you go to a public shelter, or to the home of friends or relatives, or somewhere else?  The answer to that also affects what you pack.
 
Some people consider the possibility of civil unrest, collapse, or war.  It could become dangerous to stay where they are.  Your bug-out bag would have to be packed according to whether you had a pre-planned place to go or just fleeing.
 
Those are all things to think about when you pack.  If you have a preplanned place to go you probably have some supplies already stored there, so you'll just have to pack what you'll need to get there.  If you have no idea where you're going to go, then you'll have to consider the things that will keep you alive for a while, and pack with that in mind.
 
Some basic items should be in every bag.  The necessities for survival are shelter/warmth, water, and food.  Other things, such as medical supplies, are good to have, but start with those first three.
 
You're probably trying to keep your pack on the light side to make travel easier.  One of the best clothing items for warmth, which is also lightweight, is a fleece jacket or pull-over.  The downside is that they can be bulky.  If you have the space, a fleece jacket and a wind-breaker jacket give you good layering options.  You can wear one or the other, or both.  Another combination is a down vest, compressed into a ball with a rubber band or tie around it, and a wind-breaker jacket.  Try to avoid one big bulky coat because it doesn't leave enough options for temperatures in between warm and cool.
 
The cheap and small things to put in your pack that contribute to shelter and warmth are the cheap foil "space blankets" and the cheap plastic rain ponchos, both sold at most discount or box stores for about a dollar each.  You can lay the plastic poncho on the ground to protect you from moisture, and wrap up in the space blanket, or do it the other way around.  Lay the space blanket on the ground to keep your body's warmth from being absorbed by cold ground, and get inside the plastic poncho to keep wind from cooling your body.
 
If you have a larger pack you might be able to keep a sleeping bag tied to it.  However if you find yourself out in the wild in the cold, don't just sit on the ground and shiver.  Sometime I'll devote a whole post to ways to survive in that situation, but just quickly, let me say that you should try to find a sheltered place and cover yourself with leafed branches or pine branches, bunches of tall grass, or even leaves off the ground.  If there are more than one of you, sit against each other for shared warmth.
 
When my kids were growing up we camped in the woods one night without shelter.  We huddled in a dip in the ground, with leaves piled over us.  The kids also stuffed leaves inside their shirt and pants for extra warmth.  It was quite comfortable.  We watch the show "I Shouldn't Be Alive" on Animal Planet and I can't believe how many people, who are lost in the wild, just sit on the ground all night waiting for the sun to come up and warm them, and behind them is tall grass and bushes. 
 
In with warmth and shelter is fire making.  Carry at least two things for starting a fire.  Fire can be used for warmth, cooking, and attracting the help of rescuers; but keep in mind if you DON'T want to be seen or found, that the smoke by day and the glow of the flames by night could be seen.
 
The easiest fire starters for most people to carry are a cigarette lighter and matches.  There are also flint & steel and magnesium fire starters.  Do your homework now.  One of the things you can do is watch youtube videos on firestarting.  There are techniques you can learn, such as bow drill and hand drill, for starting a fire with only what you find in the woods, but unless you get a chance to practice this in real life, you're taking a chance by assuming you could do it if your life depended on it.
 
That said, watch the videos anyway and learn the techniques, because if you find yourself in a situation where your life does depend on it, at least you'd have the general idea of what to do.
 
Water is the next item of need.  There again you have to look at your probable situation of bugging out and decide how much water to carry, and how to plan on filtering if need be.  If all you ever expect is to go straight from your home to a shelter or a friend or relative's house, you won't need as much water.  If you're preparing in case you have to head for the hills, you'll need to plan a bit more. 
 
The weight of water is going to be a big factor.  You can only carry so much.  Look into options for filtering and purifying water.  This could be as simple as boiling it, or as complicated as running it through a filter and purifier.  By the way, once water reaching the boiling point it's safe.  It doesn't need to boil for 5 minutes.  Boiling kills pathogens (bacteria, viruses, etc.), but doesn't remove chemicals and other pollutants.
 
Filtering and purifying are not the same thing.  Filters just remove the debris.  Some commercial filters will remove SOME bacteria and other pollutants, but find out before you buy.  A purifier does just that...it purifies the water so it's safe to drink.  It can still have some debris in it but be safe to drink.
 
But I don't want to make this complicated so here's the deal.  Carry at least a couple of those small water bottles.  You can buy a filter straw from places like Cabelas, and water purifying pills from sporting goods stores.   If you must filter water in the wild you can make a primitive filter.  If you can find a can or non-glass bottle, that'll work; or you might have to use one of your water bottles.  Take the pocket knife that you packed in your bag (did I mention that?) and poke holes in the bottom of a can or bottle. 
 
Now find some sand and fill the bottle/can about a third full.  Look around for charred wood, such as from an old campfire or a tree or stump hit by lightening.  If you can't find some, and you're able to make a fire, you can burn some wood until it's good and charred, then pull it out of the fire using another stick.  Crush this "charcoal" and make a layer on top of the sand in the bottle/can, about as thick as the sand.  On top of that, sprinkle some small gravel or stones.  You can put a little bit of grass on top to help catch and filter debris, but the gravel will do it too.
 
Pour water into the filtering bottle, holding the other bottle below it.  If you have a way to tie them or brace them on rocks or logs so you don't have to hold them, it's a good idea, because it takes a while for the water to run through the charcoal and sand.  But in the end you should have water that is safe to drink. 
 
If you're ever lost in the wild and don't have a bottle with you, keep your eyes open.  Mankind has left a trail of garbage behind for centuries, and even the most remote place can turn up old cans.  Hopefully you'll be in a place with abundant water.  Finding water in dry or desert areas is a whole other subject.  If you expect to be in an area like that, learn about solar stills, how to find springs, and how to look for pockets or water in rocks or trees.  Staying hydrated by 'drinking' cactus juice is more likely to give you diarrhea.
 
Moving on to food, at the very least we keep a couple of granola bars in our packs.  A few hard candies can be good for keeping energy levels up while you walk.  If you're expanding to add more food, think 'calories' and 'fat'.  This is the time when you want as much of both as possible.  They'll give you more energy for the size than foods with less of either.  Something with peanut butter or coconut oil, or other fats, plus sugar, is good.  However, if they're in a candy bar like Peanut Butter cups, you run the risk of it melting.  Peanut butter M & M's are a good one to carry.  You can nibble on one or two at a time and stretch them out for hours.
 
If you have the space and can carry the weight, a jar of peanut butter is good to have.  Change it out twice a year so it doesn't get old and rancid.
 
In addition to our packs we have 2-gallon plastic buckets with airtight lids from a local bakery.  My husband and I each have one and we call them our "Bug-out buckets".  Inside is a jar of peanut butter, a jar of coconut oil, and a can of sweetened condensed milk (not evaporated milk).  These are all high in calories and fat.  Peanut butter has protein and the condensed milk has carbs, in addition to the calories and fat.  We also packed a bunch of odds and ends like hot cocoa mix, hard candies, matches and a lighter, bandaids, small LED flashlight and a set of extra batteries, a pair of socks, an emergency poncho, and a space blanket.  I think there's a few odds and ends like a tube of chapstick and a small comb.
 
These buckets are pretty lightweight and easy to carry.  Depending on the circumstances we'd grab those in addition to or instead of our packs. 
 
For the possibility of being in the wild long-term it's a good idea to learn foraging.  Get a good book on edible wild plants for your area and study it.  Go out and look for these plants, harvest and eat them.  Make sure you're picking the right plant.  If you can find a mentor that's the best route to go, or take a class.  You can stretch the food you carry and survive longer.
 
This is a good thing for everyone to learn.  Once you master the wild plants of your area, study up on the edible wild plants of places you might travel to.  It increases your odds of survival if you get lost or have to flee into any wild area.  Keep a whistle on a string attached to your bag.  It's easier to blow the whistle to attract help than to shout for hours.

Read about, or watch youtube or other videos, on making a survival shelter.  It doesn't take much knowledge to break off and gather branches, the leafier the better, pile them up and get underneath or in among them for warmth or shelter from the wind.  Enough pine branches can shed water too.  Find a fallen tree and lean branches up against it to make a small shelter you can crawl into.  Have another pile handy to pull into the doorway after you get in, to further contain your body heat and keep out wind.  You won't suffocate.  Enough fresh air will filter into your shelter to provide you with oxygen.

If it's winter, dig a hole in the snow, line it with branches and pull more in over you.  Even a snow cave with no branches to put in it will be warmer than the outside air, plus provide protection from the wind. If your car gets stuck in the snow and it looks like it'll be a while before you're rescued, or it's so cold you won't survive even a short stay, rip your seat covers and pull out the stuffing.  Put it inside your clothes for added 'warmth'.  I realize this isn't bug-out bag information but it's still good survival information.

You can make your bug-out bag as complicated as you want. Here's a website that specializes in survival kits and packs, and carries a wide line of things you can put in your bug-out bag:
http://bepreparedtosurvive.com/ 

But this post is about the uncomplicated bug-out bag; the simplest bag you can put together.  For a simple, uncomplicated bug-out bag that you can assemble with what you have on hand: a layered combo of jackets, a spare pair of socks, a spare pair of underwear, matches and a lighter, a couple of water bottles, a handful (or more) of hard candy (mints, butterscotch, whatever you like), a big bag of peanut or peanut butter M&Ms or trail mix.  That is the basid stuff that will keep you going for a few days.
 
You can add whatever you want to it.  You can get the space blankets and emergency poncho, and you can put in more food, more clothes, maps, compass, small pair of binoculars, a deck of cards, a book or a kindle/e-reader, whatever you want.  Just don't over-burden yourself and end up struggling to carry the bag.  If you require medicine, try to keep some in the bag and rotate it.  Add things like tylenol, a pair of reading glasses if you need them, nail clippers, and a small bar of soap.
 
If you have the money and the time, you could buy a spare kindle (or other e-reader) and fill it with books that will help you survive in the wild.  You could get medical books, foraging books, how-to build books, whatever you think you'd need.  Check it from time to time to make sure the battery is charged, and keep the wifi feature turned off unless you're adding more books, to save on battery life.  You can also buy a small solar charger for things like Kindles and cell phones.  They're pretty inexpensive, starting around $15 last time I looked.
 
These are just some ideas to help you get started.  No one is completely immune from the possibility of having to leave their home, so it's a good idea to toss a few of these things into a bag and have it ready. 
 

Saturday, September 8, 2012

New Book - Food Self-Sufficieny: Reality Check

It's here!


    More great information for preppers, homesteaders, and others who have a goal to work toward food self-sufficiency!  Find out what you'll need and how much, to produce and store your own food!  Read great tips from my own experiences.  A great deal, for only .99 on Amazon!

http://www.amazon.com/Food-Self-Sufficiency-Reality-Check-ebook/dp/B0097G797U/ref=sr_1_14?ie=UTF8&qid=1347456082&sr=8-14&keywords=susan+gregersen

Here's a list of the chapters in the book, so you can see if there's a subject of particular interest to you:


Table of Contents

Chapter 2 Jars
Chapter 3 Chickens
Chapter 4 Other Domestic Meat Animals
Chapter 5 Grains
Chapter 6 Foraging
Chapter 7 Hunting
Chapter 8 Fishing
Chapter 9 Conclusion

And here's the Introduction, copied and pasted from the book file.  It'll might help you decide whether to buy the book.


Introduction

     Often in conversations the subject comes up about growing or producing our own food. Some people want to move to the country and get into small-time farming, and some just want to have a garden. Others want to have a few meat animals around, such as chickens or rabbits.
    There are also those who want to work toward producing most or all of their own food. Some like the independence and some worry about future hardships, either from natural disasters or man-made events.
         But if you're going to grow a garden or crops, what do you need to do that? How much land? What type of land? How will you preserve and store the food you grow?
Animals need shelter and food. Do you have a place to put your chickens, rabbits, goats, calves, or other animals? What will you feed them if times are hard? How will you feed them now, if your goal is self-sufficiency? Will your plan include buying feed, or growing it yourself?
         In addition to gardening and raising animals, other sources for food self-sufficiency include foraging, hunting, and fishing. What supplies or equipment will you need to do these things? What laws will you have to follow, and do they allow you enough plants or animals to meet your needs.
         This books is about the numbers. It's not a how-to book, it's about what you need for the “how to”. We'll look at how to figure out how much space you need for gardens or animals, how many jars you'll need if you plan to get into canning, and what other options there are for storing food.
         I'll talk about animals and their needs, and suggest ways to feed and shelter them that won't break your bank account. I'll try to point you the right direction to find out what you need to know about foraging, hunting, and fishing, plus share some tips from my own experiences.
        This book is geared toward those with limited funds, but will also be helpful to more prosperous readers who are considering growing or otherwise providing for most or all of their own food. The 'how-to' may vary but the numbers are the same, whether you're rich or poor.
         Some people are 'preppers' and have been buying and storing food in case of hard times. It's a great plan, but knowing how to produce your own food is real security. Hand in hand with that is knowing what you'll need to produce, preserve, and store that food. That is what this book is about.
 
This book kind of snuck it's way from my mind and out my fingers on the computer keyboard.  It's not the second book I'd planned to write, and still plan to write.  But now that one will be Poverty Prepping, Volume 3, and whatever subtitle I give it.
 
So keep those stories and comments coming.  The winners of our prep items contest will be in the third book...the one that was meant to be the second book!
 
Susan

Tuesday, August 21, 2012

Another reader shares her prep story

Here's another story from a prepper who has been through some hard times:

"You asked about why/how we got into preparing. I grew up on a farm. My grandfather made it through the depression, and impressed the idea of stocking up on my father. On the farm, we raised 80% of our foodstuffs (eggs, chicken, milk, beef, vegetables, fruit, etc.) and went to 'the big city' shopping once a month. It was a major event: Items my step-mother refused to make (bread/rolls) and staples were purchased, often taking up two or more shopping carts. Not too many people thought much of it. There were eight in our family, including five boys and myself. Most people saw my five brothers and didn't think twice about it. After the shopping was done, we were allowed (so long as EVERYBODY behaved at the store) to stop at the Golden Arches before going home. Based on age, we got a small fry, a small soda, and one to four hamburgers/cheeseburgers. It was the only time we had soda and we all tended to suck it down like it was the nectar of the Gods!
I left the farm, and left that life behind. I was so happy to join the consumer nation, buying food as I needed it and replacing clothes instead of repairing them! Slowly, my excitement abated. To ease my 'fears', I began stocking up a little 'just in case'. My husband used to make fun of some of my habits, saying "Uh-oh, we're down to 24 rolls of toilet paper! You better run to the store for more!" "Why do you garden and can? I make good money, go to the store and buy it!". Well, he got laid off. Five and a half months later, he was still laid off. In his entire working life, he'd never been off for more than a month, so it was a shock. Once he realized my 'weird habit' of stocking up had helped us get through, he jumped on board with both feet! After going back to work, he encouraged me to set money aside each payday to buy extras to have on hand. My garden became a family project. Experiments with different crops became common, to see what grew best and provided the most in the least space. He built me square foot gardens, to test that theory. Canning was no longer scoffed at, and dehydrating was experimented with.
I feel like I've come *almost* full circle now, and I'm surprised to say I've never been happier. We bought a small property and now have chickens, cows and are about to get pigs. I bake all our own bread, cook 75% of our meals from scratch, have expanded the garden to just shy of four times the size I started with, we put in a small orchard and berry patch and hubby surprised me with a greenhouse this year. I am still addicted to soda (Ahhh, sweet nectar!), and shop more than once a month but, for the most part, I have returned to my past way of life; with my own twists. For example, I have a cell phone, internet, and satellite TV. Hey, some habits are hard to break!"


It was signed "CCWriter".  Thank you for sharing this with us.  It sounds like you had a great childhood and learned some good skills and habits!  Hey, who doesn't have some kind of habit like soda! :)

I'm glad things are going better for you.  Your small farm sounds really great.  Good luck and best wishes!

One of the best things that has come out of this book is the emails I get from readers.  Please keep sending them! 


Saturday, August 18, 2012

Stories and suggestions

I love printing the comments and suggestions I get from readers!  Today I was delighted to find this one in my inbox:

"Was just reading your book and you have some fabulous ideas! A couple of tricks I wanted to share. We get soda bottles from different people and store things in them. I especially like to use them for storing water. And the small bottles are great for things like salt. Another idea is that some places put the hand/feet/toe warmers on clearance at the end of winter. You can use these instead of the little oxygen things to help store food longer. I am looking forward to getting time to sit down and read your blog!
You friend in prepping,
AS Johnson"

Thank you for sending that in.  It seems like soda bottles would be good storage containers because they're of a heavier plastic than water bottles or milk jugs.  Good suggestion.  Of course, after you wash them good, make sure you let them dry for a couple days! 

I'd never heard that about the hand warmers, but if they're oxygen-absorbing, that would work.  I'll have to look for some at the store myself!  I wish I had one right now so I could double-check for harmful chemicals or any other reason why they wouldn't be wise to use, but I don't have one.  So I'm publishing this and not really sure if it's safe. Please use caution until I have more information for you.

I also got an email from a reader named Sue that started with "Just read your book – gave me some ideas on things to start storing! Thanks... will be starting with rice and getting the 5 gallon buckets from our bakery ($0.50 each)."  She went on with some great suggestions for the new book, Poverty Prepping II, which will be included in it, along with credit to her for the ideas!  Thanks a bunch, Sue!  Keep the ideas coming, folks!

My favorite kind of emails from readers are those that give some insight into their lives.  It's interesting to read what people have been through or what prompted them to think what they eat, how to get it, and whether they should store food.

Here's one from a remarkable woman named Jackie, printed here with her permission:


"I have been a prepper for many years and am now a vegan, all plant no animal products of any kind and no fat added. I use every possible type of bean in my cooking along with brown rice. Been a gardener for 40 years. Retired from teaching at 71 and began propagating landscaping plants, herbs, veggie plants, growing out berries and fruit trees.
You mention having skills to barter with. I agree most definitely!!! Very big into self reliance. Not been on the militant survivalism. Learning wiring and plumbing now. Do woodworking, sewing, major food preservation-freezing, canning, drying, and know the basics of root cellaring, and if given physical assistance, can produce enough veggies for anyone on this mountain to eat plus I am the only one with a natural water supply for a garden. Not good at foraging!! Much to learn there, but will probably stick with what I can grow here and there on the land. Always looking for new edible plants to put in.
I have needed the food, cat food, dog food, cat litter, water, and bottled gas for my generator to save the food in the deep freezer. In the last two years, we have had two major ice and snow storms that tore down trees, electrical and phone poles, and cut the satellite Internet service and cell phones for extended periods of time. The first time was the infamous ice storm which brought utility workers from out of state to get us back on the grid-for me, 23 days with no electricity. The second time was a 17 inch snow in an area that normally sees one to three inches of snow at a time a couple of times a winter. Mostly, we see more freezing rain. The temperature with the 17 inches of snow was minus 15 degrees. Normally do not see temperatures below zero. My granddaughter and I made it through both storms just fine. The only things we lost were milk and eggs in the refrigerator."
 
 
Jackie, I really enjoyed reading this.  Thanks for letting me share it with everyone.

HomeGrown Tea

Hi Everyone!  I've been buried under raspberries and peas.  We've been picking around 2 gallons of raspberries a day, and a lot of peas.  I've also been harvesting herbs and drying them.  Some are for various medicinal complaints that might arise, but our favorites are for tea.

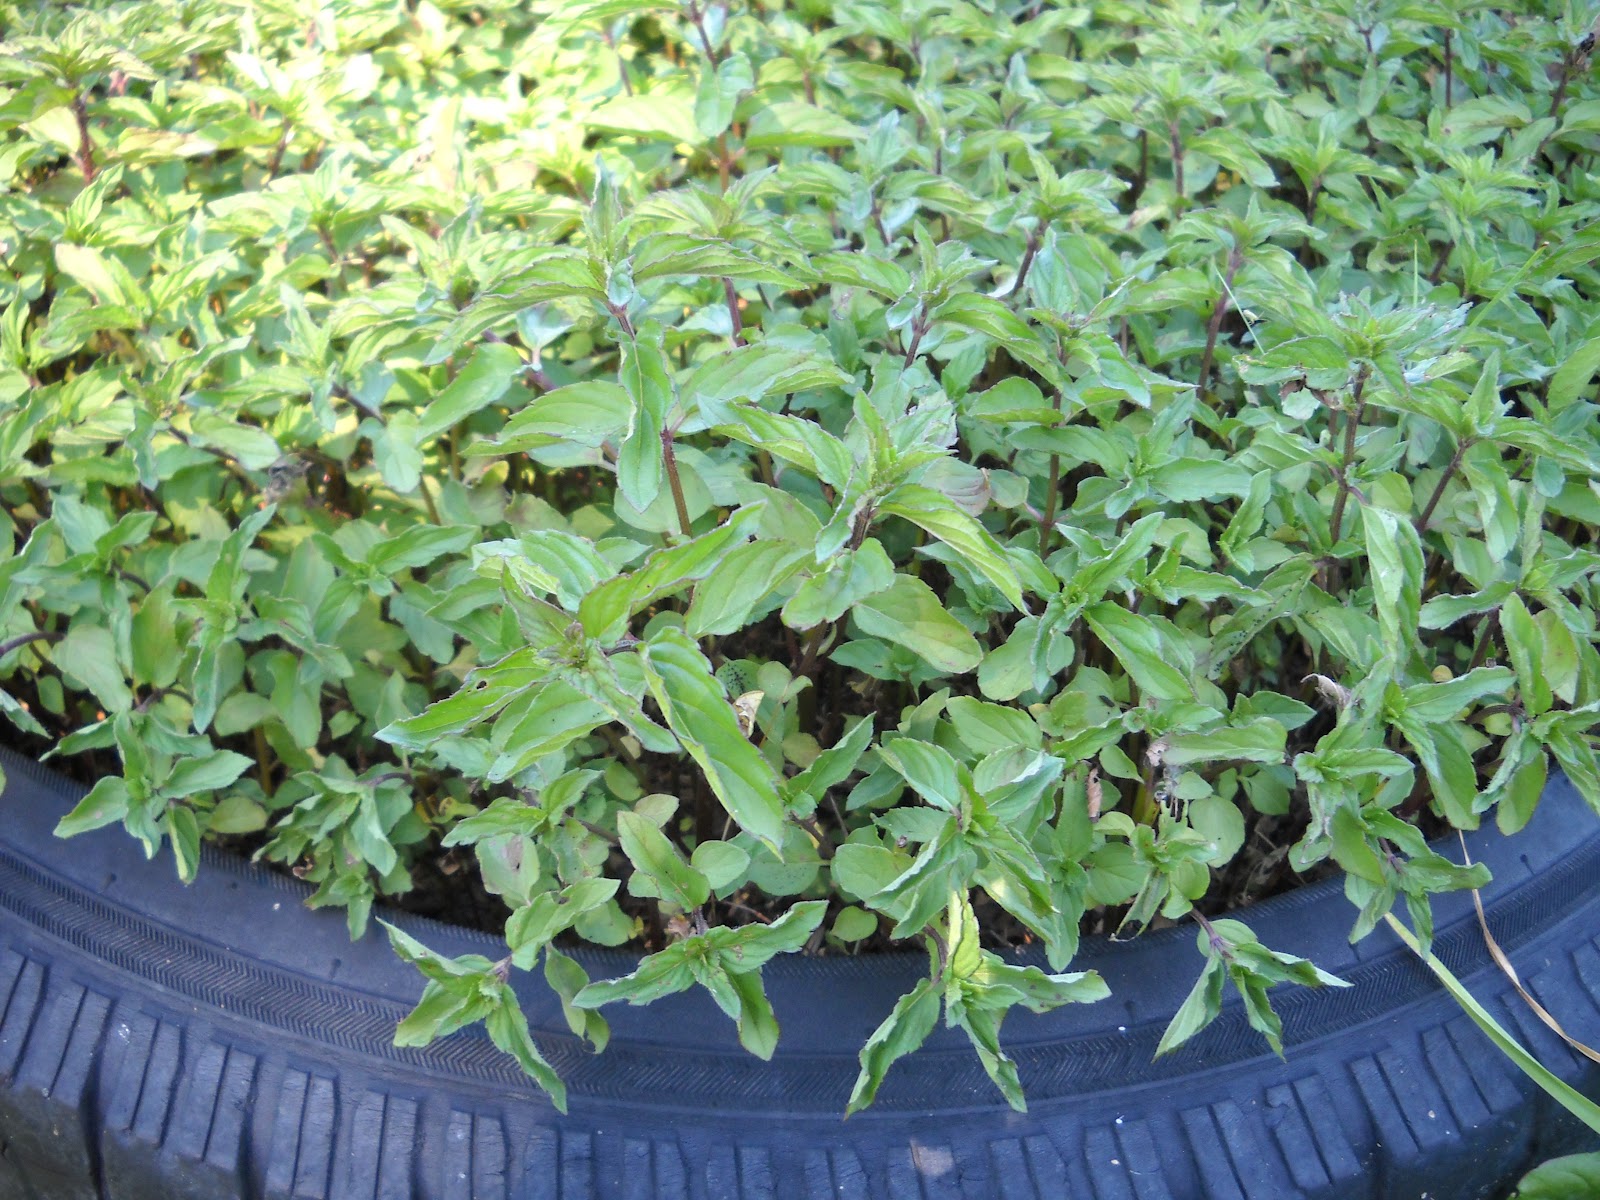
Mint is our favorite homegrown tea.  It makes great iced tea as well as hot tea, but on a summer day nothing is more refreshing than mint iced tea.  Just straight mint leaves, fresh or dried, steeped in hot water, then add cold water.  You can add sugar or honey or your favorite sweetener if you prefer it sweetened.  I grow it in tires since it spreads out and takes over.  The mint in this picture was cut a couple weeks ago and is growing again.  In our climate I can cut it three times a year if we get enough rain or I keep it watered.

Since sugar has gotten so expensive we've started drinking it plain.  It took some getting used to, and sometimes I still add sugar.

Another tea herb we grow is lemon balm.  Besides using it for a pleasant, relaxing tea I planted it because if this old world ever does have some sort of catastrophe, we'll have something we can grow here in the north that smells like lemons.  It's something I would miss.

Some wild plants you can use for tea, and that grow in most parts of the United States, are clover (especially Red Clover), Roses (the rose hips are the part used for tea), and Pineapple weed.  Pineapple weed is a member of the Chamomile family.  They grow in hard-packed ground, such as the gravely areas along roads and sidewalks, sometimes out of the cracks in sidewalks.  They have a strong Chamomile smell and the flowers look like chamomile flowers with all the petals pulled off.  Pineapple weed never gets the petals.  They just look like little pineapples sitting atom the stems.  The stems are anywhere from a few inches tall to a couple feet tall, or for our foreign readers, they're about ankle-high to knee-high.  Pictured here is Pineapple weed.

When I harvest plants, either wild or domestic, and intend to use them for tea I pick or cut them, then spread them on screens to dry. If you cut something such as mint that has grown tall, you can tie them in bundles and hang them in your house to dry.  We live in a dry climate so it only takes a few days for spread-out herbs to dry.  In humid climates it will probably take longer.  I don't have experience with drying plants in a damp climate, so if someone would like to share stories about that, I would appreciate it. 

Mint, left, drying on screen.

Once the herbs are dry I store them in air-tight glass jars.  You can store them in plastic bags or bottles but over time they can pick up odors or they can oxidize since plastic is somewhat porous, although it seems air-tight.  If I know I'm going to use them before the next season's harvest I go ahead and use plastic if I need to.  I prefer glass jars.

I save every glass jar we get, which on our budget, isn't very many.  But we do occasionally buy a jar of Salsa or something else that comes in a glass jar, so I wash them out and keep them.  Peanut butter and Mayonaisse used to come in glass jars but now they're hard to find in anything but plastic... at least around here.

These are Rose Hips (right).  After roses are done blooming they form a small fruit that looks like a little apple.  These are the 'hips', and I don't know why they are called hips!  All roses and the hips are edible, but be sure the plant(s) you harvest from haven't been sprayed with things like pesticides or herbicides.  It might also be safer to avoid those that grow along busy highways.  I haven't heard if fumes from vehicle traffic presents a health hazard if you eat these plants and their fruits, but unless you're truly starving and can't find plants away from highways, pass them up just in case.  Perhaps one of you readers have information on this.

To make tea with the hips you can crush and steep them.  Some people remove the little hairy seeds inside them first.  Just as a matter of interest, you can make jelly with the hips, too, if you're a jelly-maker.

Pictures on the left is white clover.

 Here's an interesting tidbit about white clover. I don't know if it applies to other kinds of clover, but you can dry the white clover heads and grind them into flour. It can be added to regular wheat flour for variety in nutrients, or to extend the flour to provide more meals. This is useful information if times become very desperate. This was done during the famine in Ireland, among other times and places.


This is purple clover, and there is also Red clover, but I couldn't find any around my yard toay.  Clovers are edible and medicinal, but we'll cover medicinal in another post.  When you pluck a clover flower you can suck the bottom of the flower and there will be a small drop of honey-like sweet fluid.  It would be interesting to know if a person could make their own syrup-like sweetener by any process or extraction, at least one a person could do for free in their home.  Meanwhile, you can make a delicious slightly-sweet tea that you can drink hot or cold.


Other refreshing teas can be made from such plants as Raspberry (picture), Strawberry, and Blackberry leaves.  They won't have the faint berry-ish taste of commercial teas in those flavors, but you can mix them with other tea plants such as rose hips for more variety.  The bottom line is finding delicious, healthy foods that are free.  Many areas have wild berry plants, especially in wooded areas or along creeks and rivers.  The berries are delicious too!  If they're in season while you're harvesting leaves for tea, pick some berries and add them to your tea.  Crush them in your hands and either just squeeze the juice into your tea, or smush them up good and toss them in!                                                                                                                                   


Plants with leaves, such as mint, can be stored whole, or you can strip the dry leaves from the plants to save space in the jars or bags.  The sticks and stems won't hurt if you choose to leave them in, but the leaves are mainly what you are after.  In this picture I have been stripping the leaves, packing them into the jar, and making a pile of the sticks in the lower-right corner of the picture.

I admit to still being in the learning process myself, so I have shared with you what I know, while admitting what I don't know.  Comments, suggestions, and any information you wish to share are helpful.  We can all learn together.

As with all plants, both wild and domestic, make SURE you are certain the plant is what you think it is.  If you have any doubt, find someone reputable that knows the plant and ask.  In most places you can pick a sample of the plant and take it to the county extension office and they'll tell you what it is.  Please be careful as you learn.

Comments:

"I live in N Central Texas, which has become quite humid over some years, and how I dry my tea (and other) herbs is in brown paper bags. The herb must be completely dry and the bag as well, with nothing else in it. If I am hanging the herb(s) in bunches (like Yarrow), I put them in the bag, top down, and tie a tie around the top of the bag and hang it in the driest place I have. Otherwise, I put the herb in the bag, roll the bag down at the top, clip it and set in a dry place. This has worked very well for me.

And thank you for your lovely blog. :)

MtWoman"

Received via email Tues. August 21, 2012.  Thank you, MtWoman!  I'm guessing the paper bag wicks moisture away from the plants as they dry?  It's wonderful to get this tip from someone who lives in a humid climate.


Sunday, August 5, 2012

You are amazing people!

The entries are coming in for the contest, and there are a lot of you out there with great ideas for food storage items and how to use them! 

I've also been enjoying the personal things some of you are telling me about your lives.  There have been stories about how some readers found themselves in unexpected hardship and how they got through it.  Quite often it seems to be what led people to start being "preppers", to start storing food and other necessary items.

It got me thinking how nice it would be to share some of the stories with you.  I'm sending emails to them for permission.  If anyone else has something they want to tell about their life, please email me.  It can be something simple and short, or more lengthy.  Your privacy will be protected and I won't post your email address.

There are also some good testimonials and stories on the reviews for the book on Amazon.  Drop back by where you bought the book and read the reviews.  I've enjoyed hearing from people. 

Susan
povertyprepping@yahoo.com